Custom Groups
Introduction
With custom groups, users are able to define their own groups and manage contributing users themselves. To use custom groups, the administrator has to enable this feature.
Notes
Note that the admins can:
-
Restrict the management of custom groups to admins
-
Define that admins do not have access to custom groups
-
Define that global groups can not use the custom groups feature
For details contact your administrator.
Creating Custom Groups
To configure custom groups, go to
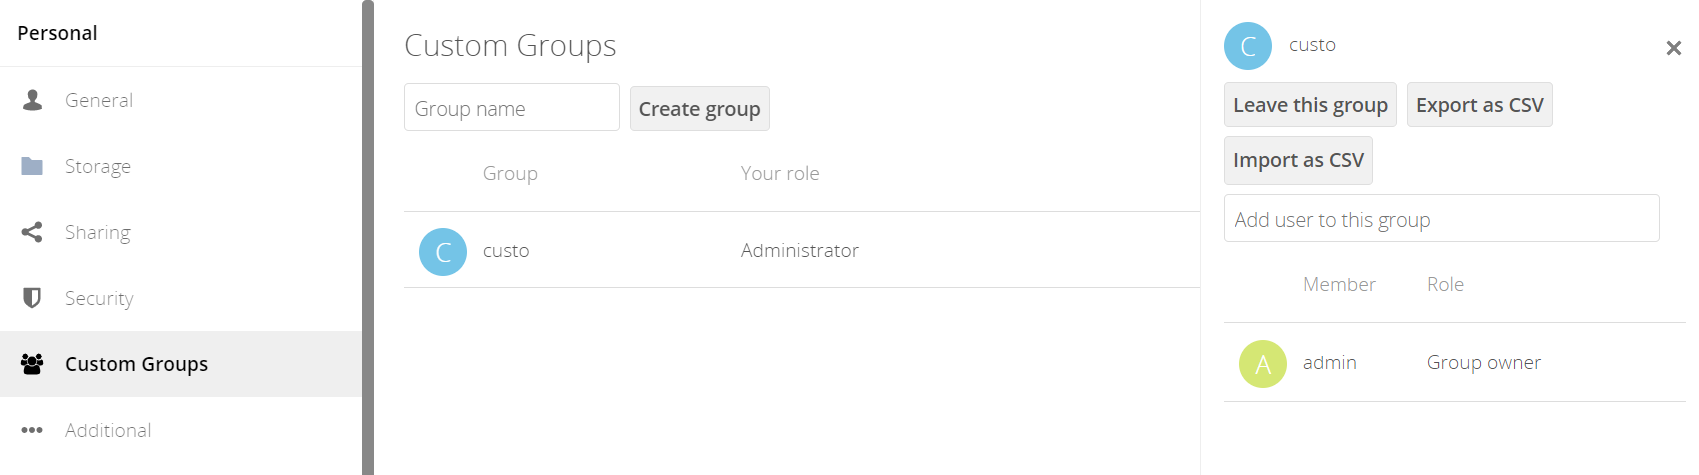
To create a new custom group:
-
in the text field at the top where you see the placeholder text: Group name
-
enter the group name and click Create group.
You will see the new custom group appear in the groups list.
|
Please be aware of two things:
|
Managing Custom Groups
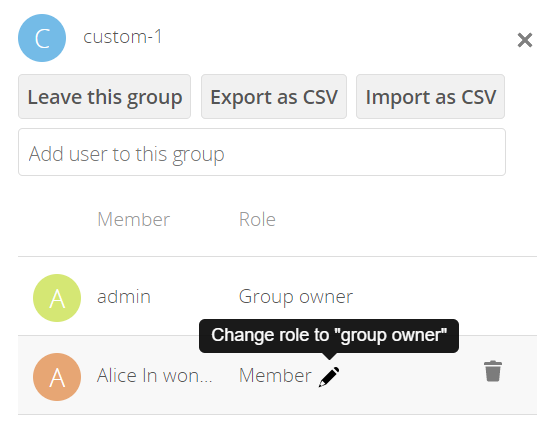
You can add users, remove users or change a user’s role. Click on the group name and a new frame will appear as shown in the image below. Changes can only be made if you are either ownCloud admin with custom group permission or group admin.
-
When adding a user, just start typing the username and suggestions will get listed.
-
If the ownCloud admin has enabled the Guests app, you can also invite external guests to this group. To do so, just type the email address of the guest to invite. It is not sufficient to add an external user to a custom group to grant him access to your ownCloud. The custom group must be member of a share that is created. The external user will then be able to access the shares granted to the custom groups he is member of.
An ownCloud administrator can create a domain blocklist for guest user invitation. -
You can share with multiple users at once by entering their identifiers (e.g., display name, user ID, email address, federated cloud ID) as a comma-separated list in the sharing dialog (e.g.,
alice,bob@example.org,carol. Based on the inputs, ownCloud will decide how to create the shares (e.g., share with an internal user, invite a new guest, create a federated share). This way, users can easily invite many recipients at once. -
When removing a user, click on the Waste bin symbol on the right side of the user.
-
Click on the Pen symbol to change the users role.
-
With the button Leave this group, you can remove yourself from the group.
-
Via the buttons Export as CSV and Import as CSV you can export or import your group members and their roles.
| Members can only use a group for sharing, whereas group owners can manage group membership, change a group’s name, change members’ roles and delete groups. You can add as many group owners as you like. |
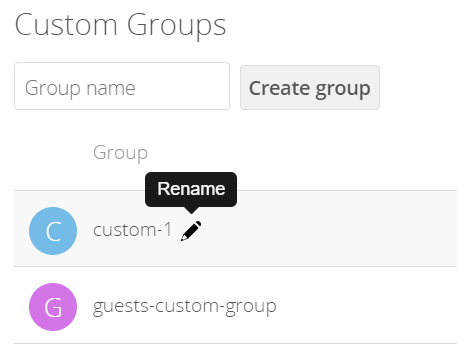
Changing Group Names
If you want to change the name of a custom group, move the mouse over the group’s name in the custom groups list, and a pencil will appear to the right of the current name. Click on it, and a text field will appear with the existing name. Change the name and click enter.
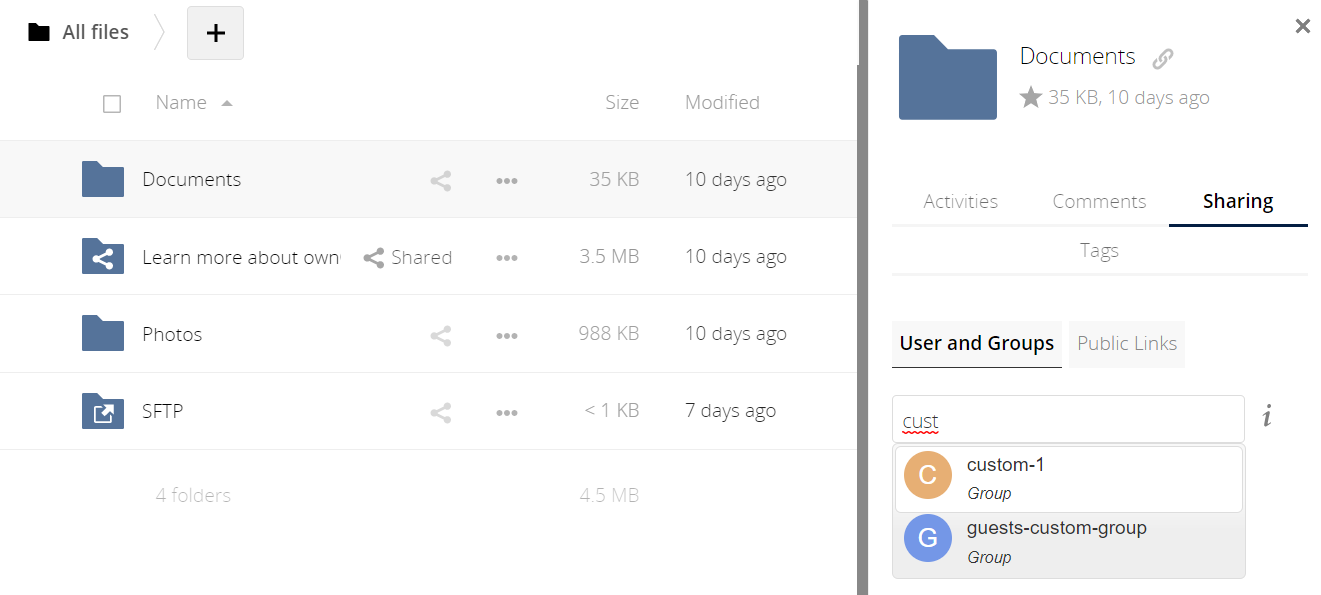
Sharing With the Group
Sharing a file or folder with your custom group works like sharing files and folders with other users:
-
Open the Sharing panel in your files view.
-
Then, in the User and Groups field, type part of the name of the custom group.
The name of the group should be displayed in a popup list, which you can see in the screenshot below. Click on it, and the file or folder will then be shared with your custom group with all permissions initially set.