Full Text Search
Introduction
ownCloud offers the ability to use full text search via the Full Text Search app connecting to an Elasticsearch Server. This allows users to search not only for file names but also for content within files stored in ownCloud.
The Full Text Search app integrates full text search into ownCloud, powered by Elasticsearch. This document describes how to setup the ownCloud part of the Full Text Search app.
Prerequisites
-
A fully functioning Elasticsearch Server. Follow the Installation and Upgrade Guide for your environment.
With version >=2.0.0 of the app:
-
Elasticsearch version > 7 is required and has been tested
-
and is supported up to version 8.6.2 though newer versions may work without any issues.
-
-
The Ingest Attachment Processor Plugin lets Elasticsearch extract metadata and text from over a thousand different file types such as PPT, XLS, PDF and more. To install the processor, run the following command from your Elasticsearch installation directory:
sudo bin/elasticsearch-plugin install ingest-attachmentPost installing the Plugin, you need to restart the Elasticsearch server:
sudo service elasticsearch restart
Installation
To enable the Search App:
-
Use the App Commands to enable the
search_elasticapplication with:docker compose exec owncloud occ app:enable search_elastic -
Or enable it via the GUI .
Configuration
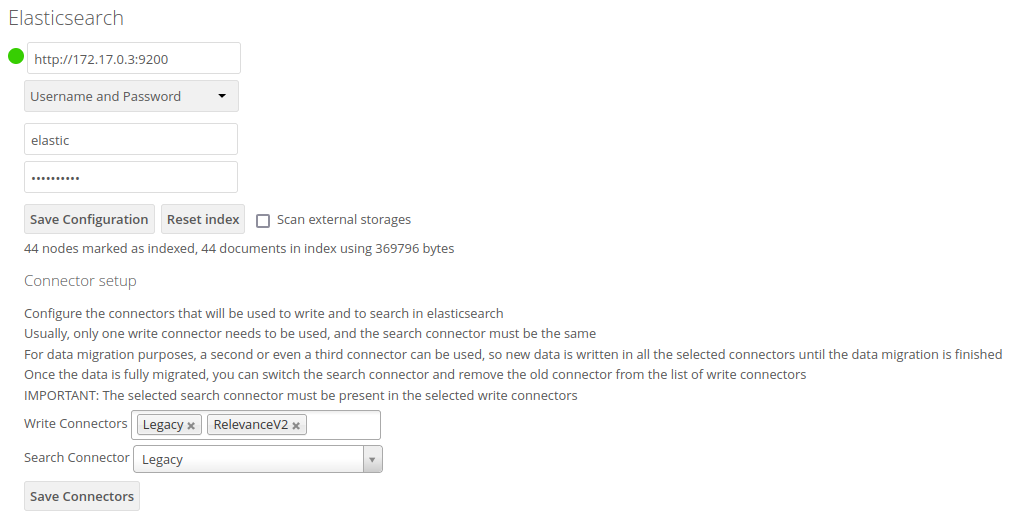
To configure the Full Text Search, go to .
Authentication Methods
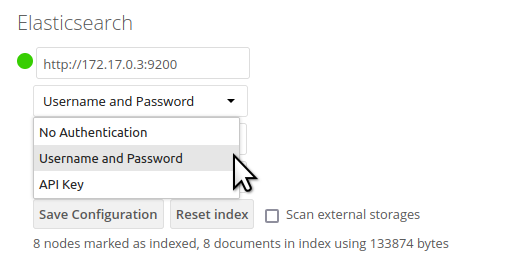
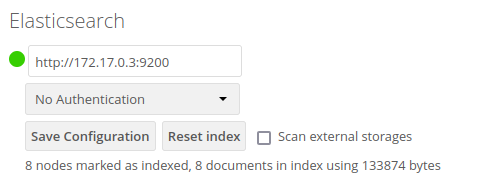
Independent of the authentication method selected below, you need to provide the URL of the Elasticsearch server. For any of the authentication methods selected, your Elasticsearch server must be prepared upfront.
For the URL, both HTTP and HTTPS including the address and port can be used.
The app provides several authentication methods. Select the one of your choice and check out the details for the respective authentication method below:
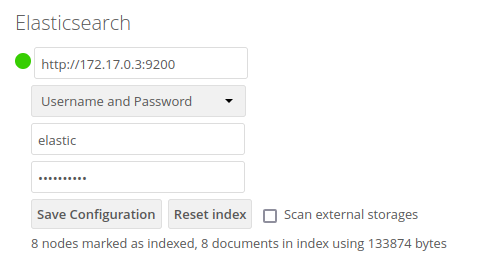
User / Password Authentication
When using User / Password Authentication, enter the credentials set up on the ES server. Note that the password will be stored encrypted in the ownCloud database.
API Key Authentication
When using API Key Authentication, enter the API Key with which the ES server was set up.
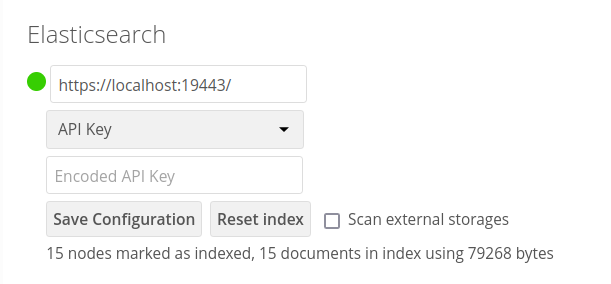
| The API Key needs to be the encoded one, not the api_key string. For details see the Create API key API at the ES documentation. |
Search External Storage
Define if external storage should be included in ES indexing by setting the checkmark accordingly with Scan external Storages. Setting this checkmark not only enables search in external storages, but also search in federated shares. Note that this setting requires to rebuild the index.
Connector Setup
There are 2 different indexes. The Legacy is the old / current one while the RelevanceV2 is the new one. The difference between the two is how index data is stored because both provide different capabilities and index in different ways. This results in different search capabilities. The Legacy doesn’t differ from the current search while the RelevanceV2 has new capabilities.
To populate the new connector with enhanced capabilities, an occ command needs to be run for each user, creating index data accordingly. See the occ command section Fill a Secondary Index for more details.
Migrating to the RelevanceV2 Connector:
-
If you haven’t indexed anything yet, you are encouraged to set up the connectors you want to use as part of the app configuration. The recommended one is
RelevanceV2forwriteandsearch. -
If you have indexed data already, use the following steps to migrate to the new index scheme:
-
Assuming you have the
Legacyconnector set up forwriteandsearch. -
Add the
RelevanceV2connector to the list ofwriteconnectors. The list should have bothLegacyandRelevanceV2. -
Run the
occ search:index:fillSecondary RelevanceV2 <user>command. The command needs to be run for all users, or at least the ones using the search app. Note that this step is expected to take a lot of time. -
Once indexed data has been migrated for all users, you can switch the search connector to use the new
RelevanceV2search capabilities. -
After checking everything is good, you can remove the old
Legacyconnector from the list of write connectors. -
Finally you can completely remove the old index from Elasticsearch.
-
With step 2, you will be writing into both indexes at the same time. This is expected to be slower. Note that step 2 just takes care of new files. Files indexed previously won’t be present in the new index. This is why step 3 is there.
Step 4 is important and you should stop at that point for a while. If something goes wrong, you can still revert things, in particular, you can switch back to the Legacy connector. In this case, use the occ command referenced above with the Legacy index.
From step 5 the actions are irreversible. If you want to go back, you’ll have to start a new migration.
It’s important to notice there isn’t any expected downtime while the migration happens. Until step 4, the Legacy connector will keep updating the index normally. When the switch happens in the search connector, the new RelevanceV2 connector will access the new index, which should have been fully updated.
Enhanced Search Capabilities with RelevanceV2
The RelevanceV2 can boost scores of recently modified files. New files should appear first though this is not a guarantee because the score of a file could be too low. Even with the boost, files could score less than older but more relevant files.
Additional searches you can do with the "RelevanceV2" connector:
-
Search by extension
ext:pdf,ext:docx,ext:gif,ext:mp4,ext:tar.gz,ext:gz, etc., any extension is possible -
Search by size, only in bytes or megabytes
-
Search by byte size:
size.b:<8092,size.b:>102400,size.b:[8092 TO 16184] -
Search by megabyte size:
size.mb:<3,size.mb:>9,size.mb:[3 TO 9]
-
-
Search by type: only "file" or "folder"
type:file,type:folder -
Search by date:
-
Search by timestamp:
mtime:<1678960862,mtime:>1678960862,mtime:[1608111372 TO 1678960862] -
Search by date:
mtime:<2021-08-25,mtime:>2023-01-18,mtime:[2022-01-01 TO 2022-12-31]
-
-
Search by mimetype:
mime:image,mime:gif,mime:textTo search for the whole mimetype such as "image/gif" use mime.key:image\/gif.
Each search term will narrow the search. For example brown ext:pdf will be interpreted as "name or content containing brown AND extension = pdf", so "brown.pdf" and "a brown paper.pdf" will appear, but not "brown.txt" or "blue.pdf"
Some examples of complex searches:
-
Files containing "confidential" updated since 2023 whose size is less than 10MB:
confidential mtime:>2023-01-01 size.mb:<10 -
Folders containing more than 1GB:
type:folder size.mb:>1024 -
Images between March and June 2020:
mime:image mtime:[2020-03-01 TO 2020-06-30]
Note that matching by name is pretty lax, so expect a bunch of unexpected results. Anyway, good results are expected to be on top.
Using occ Commands
You can use the:
-
occ Full Text Search command set to manage the app. These commands let administrators create, rebuild, reset, and update the search index. For example, the following command resets and recreates the index for all users:
docker compose exec owncloud occ search:index:reset -
occ Config Commands command set to configure the app.
Examples:
- List app settings
-
docker compose exec owncloud occ config:list search_elastic{ "apps": { "search_elastic": { "enabled": "yes", "group": "content_searchers", "installed_version": "2.1.0", "nocontent": "false", "scanExternalStorages": "1", "servers": "elastic:xxxxxxx@172.17.0.3:9200", "types": "filesystem" } } }
- Set app options
-
docker compose exec owncloud occ config:app:set \
    search_elastic scanExternalStorages --value 0
or
docker compose exec owncloud occ config:app:set \
    search_elastic scanExternalStorages --value 1
App Modes
The Full Text Search app provides two modes, which are active and passive.
Active Mode
- After enabling the app, it will be by default in active mode
-
-
File changes will be indexed in background jobs.
System cron is recommended, otherwise a lot of jobs might queue up. -
Search results will be based on Elasticsearch.
-
Search functionality based on ownCloud core database queries will no longer be used.
Active mode can cause a downtime for search when indexing starts on an already heavily used instance, because it takes a while until all files have been indexed.
-
Passive Mode
- To do an initial full indexing without the app interfering, it can be put in passive mode
-
-
The administrator can run occ commands changing the search configuration without notice to the users.
-
The app will not index any changes by itself.
-
Search results will still be based on ownCloud core database queries.
-
Restrict Search Results
Index Metadata Only
If you only want to use the Full Text Search app as a more scalable search on filenames, you can disable content indexing by setting the option nocontent to true, which defaults to false:
docker compose exec owncloud occ config:app:set \
    search_elastic nocontent --value true
|
Limit Metadata Search for Groups
If you only want to use search for shared filenames, you can disable full text search for specific groups by setting the option group.nocontent to the groups whose users should only receive results based on filenames (not the full path), like users in the group nofulltext as in the example below:
docker compose exec owncloud occ config:app:set \
    search_elastic group.nocontent \
    --value nofulltext
You can also configure multiple groups by separating them with comma:
docker compose exec owncloud occ config:app:set \
    search_elastic group.nocontent \
    --value nofulltext,anothergroup,"group with blanks"
This allows a scalable search in shared files without clouding the results with content based hits.
Create the Index
When everything has been set up and configured, you can initiate creating the index. This must be done with an occ command. Depending on using active or passive mode, you either have to:
-
active mode: wait until the job has finished and search is available to users, or
-
passive mode: users continue to search with ownCloud embedded search and you switch over to active mode when the occ command has finished indexing.
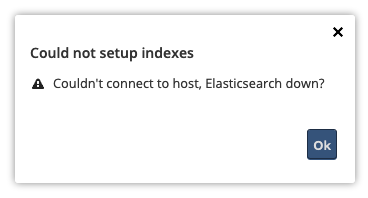
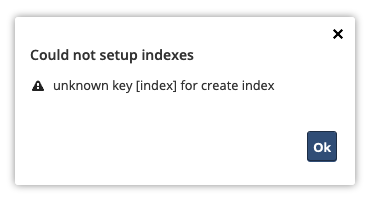
docker compose exec owncloud occ search:index:createIssues
When the Elasticsearch server is down or the index has not been set up, you may get the following message. Check if the ES server is reachable or if the index was set up properly as one solution to fix the issue.
User Manual
To find out more about the usage, check out the section in the User Manual: Search & Full Text Search.
Known Limitations
Currently, the app has the following known limitations:
-
If a shared file is renamed by the sharee (share receiver), the sharee cannot find the file using the new filename.
-
Search results are not updated when a text file is rolled back to an earlier version.
-
The app does not return results for received federated share files.
-
Search does currently not work when encrypting files via the encryption app.