Create App IDs
Introduction
A app ID or app identifier uniquely identifies an application in Apple’s ecosystem. This means that no two applications can have the same app identifier. To avoid conflicts, Apple encourages developers to use reverse domain name notation for choosing an application’s app identifier.
Create App IDs
In this step you need to create five App IDs. These are unique identifiers for your branded iOS app. You must also create an App Group and place your five App IDs in your App Group. You will need your base App ID and App Group when you build your app with the ownBrander app on customer.owncloud.com.
Create App ID
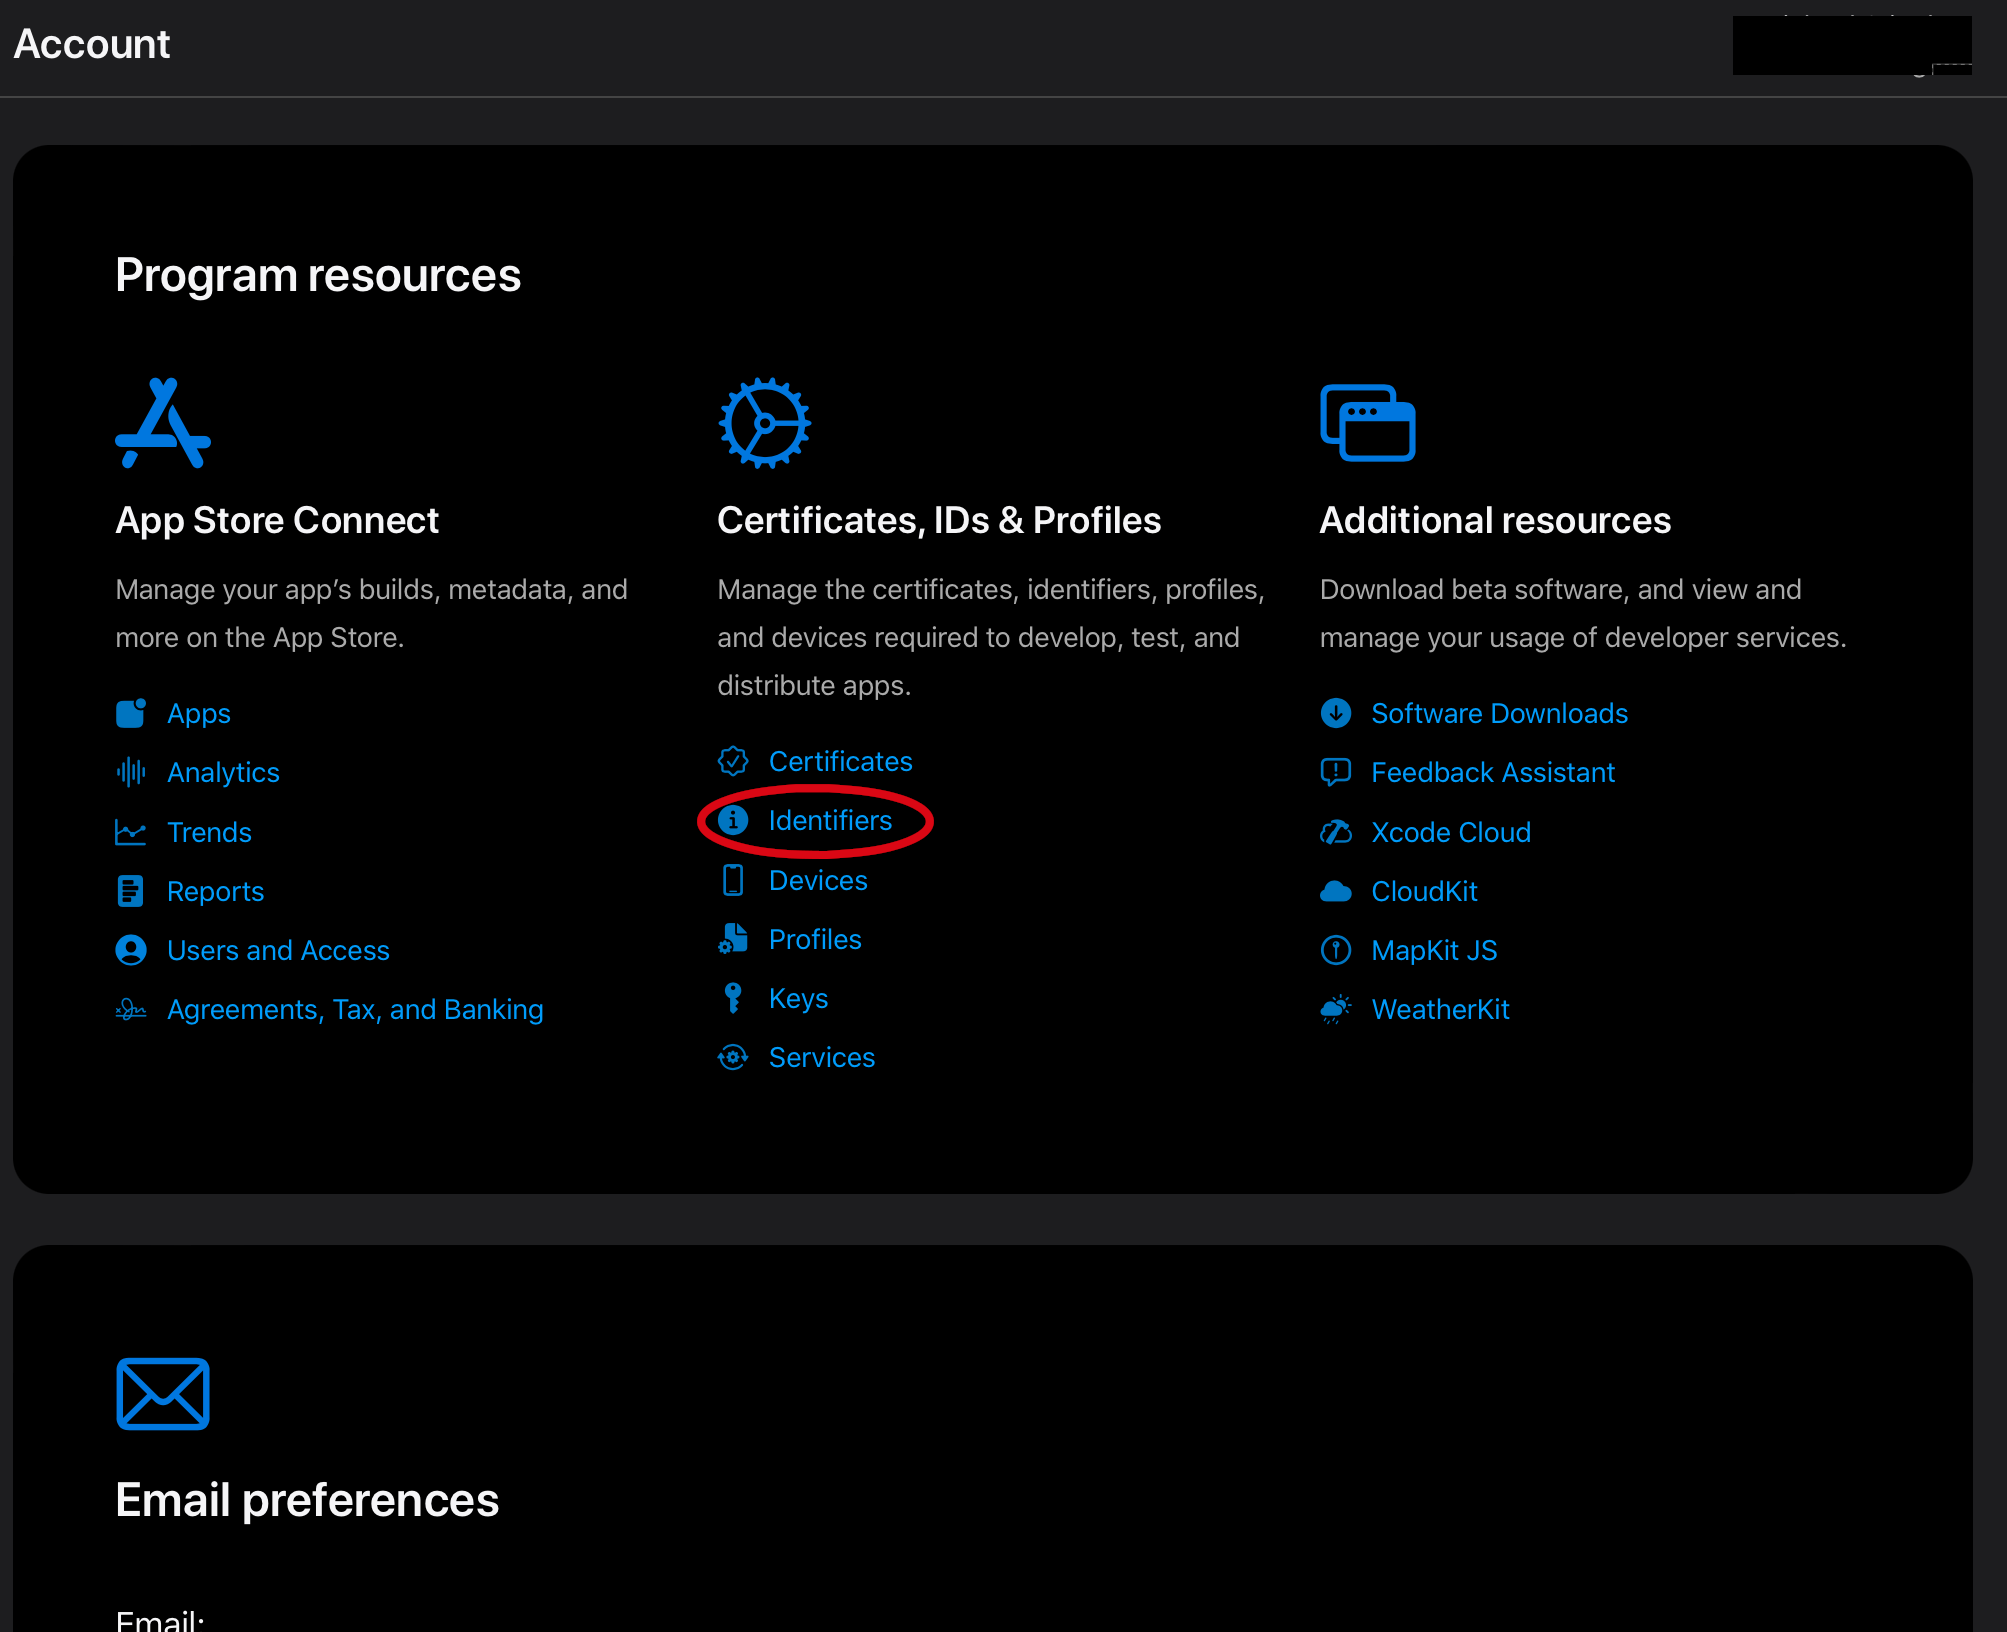
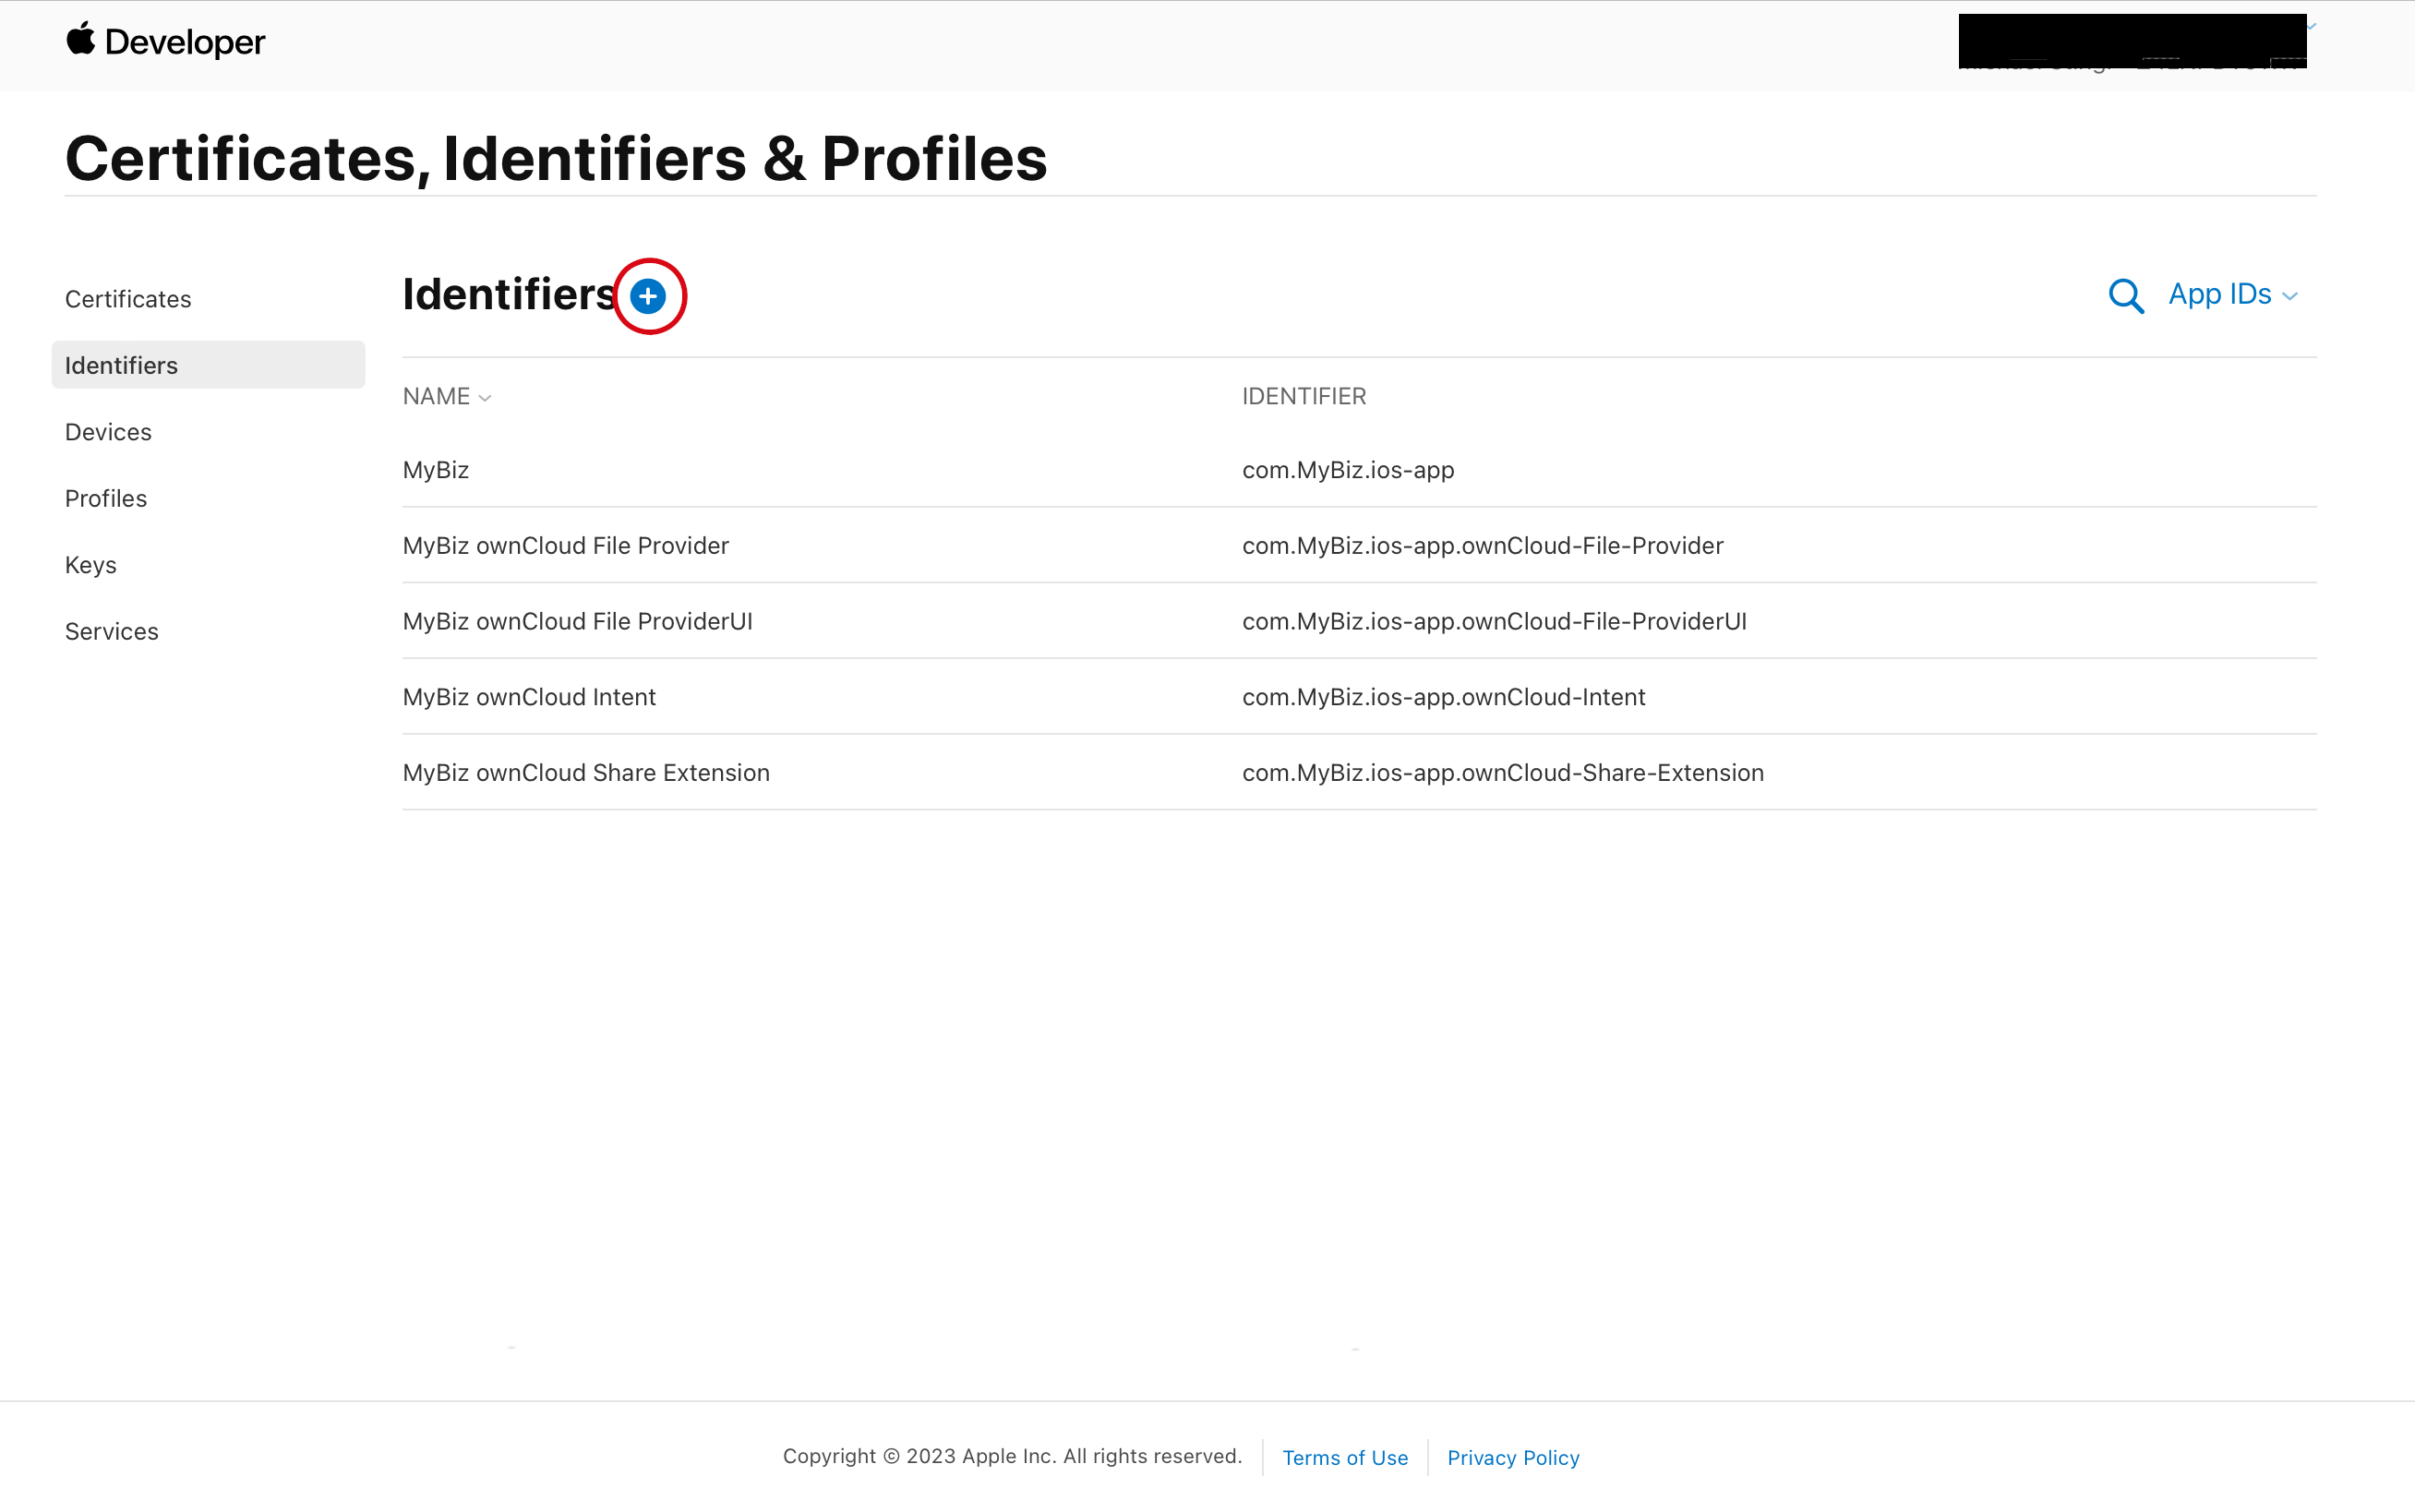
Now you must create your App ID. Go to Account > Identifiers and click the plus button to open the "Register a new Identifier" screen.
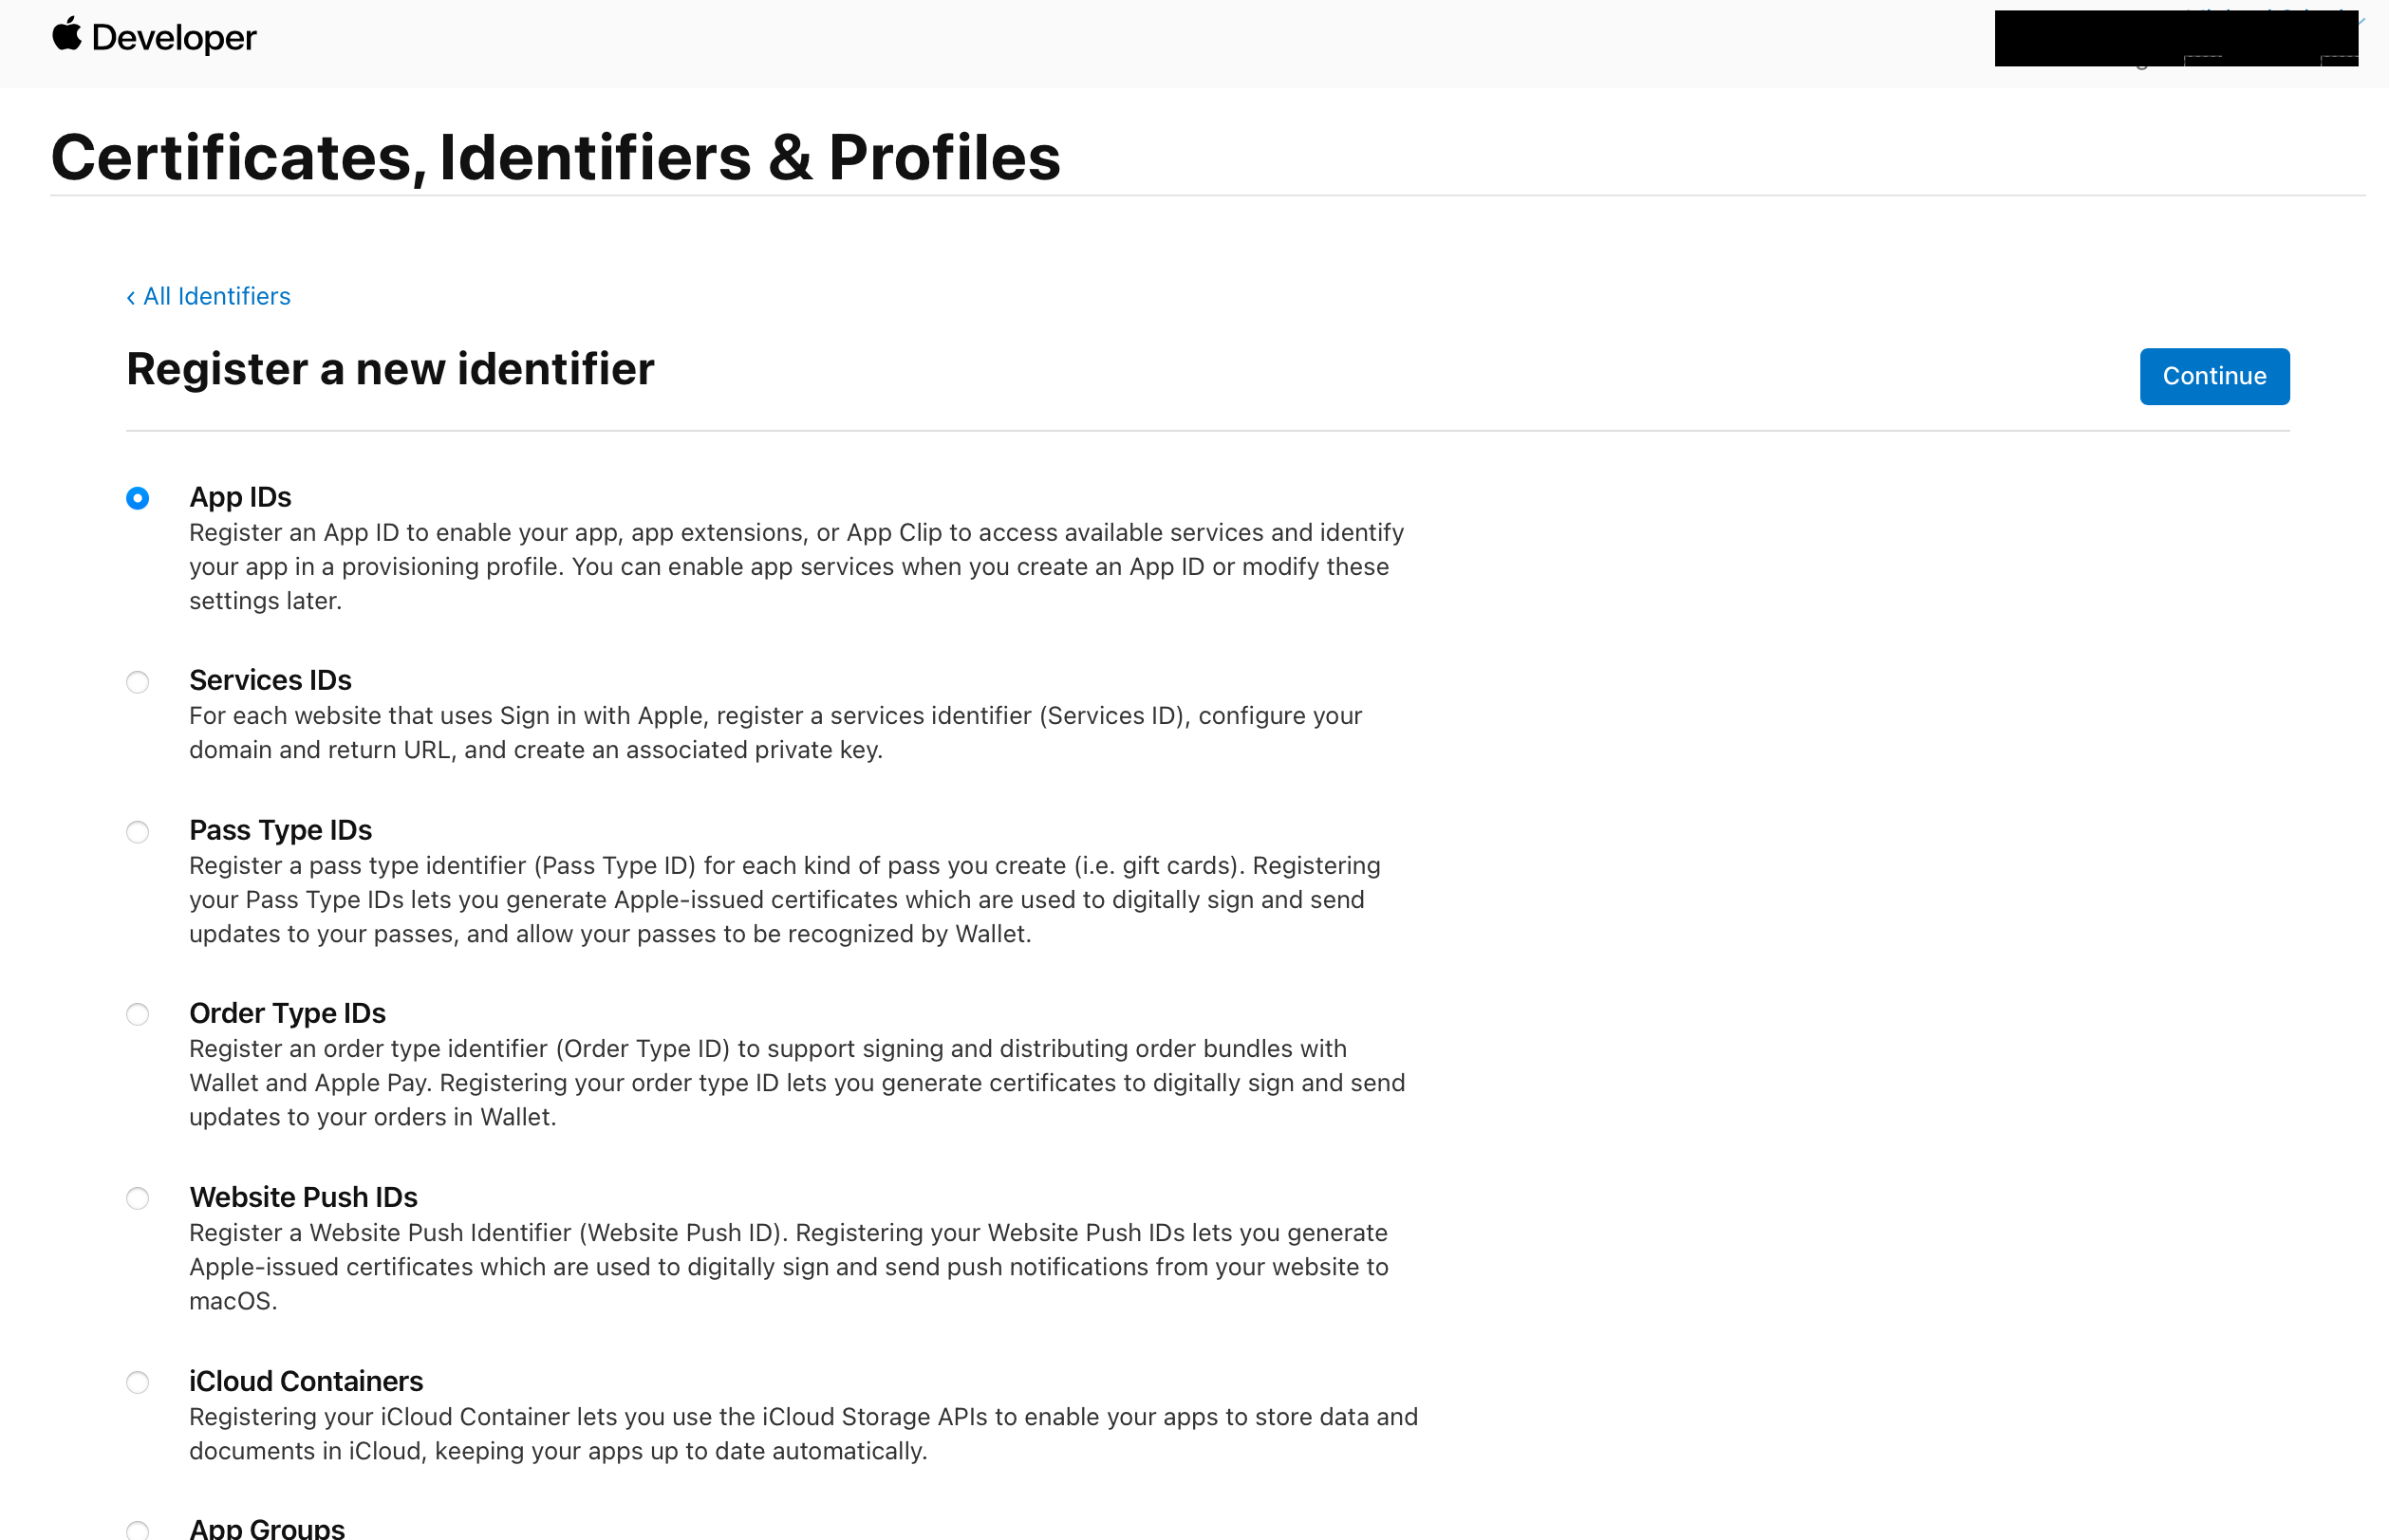
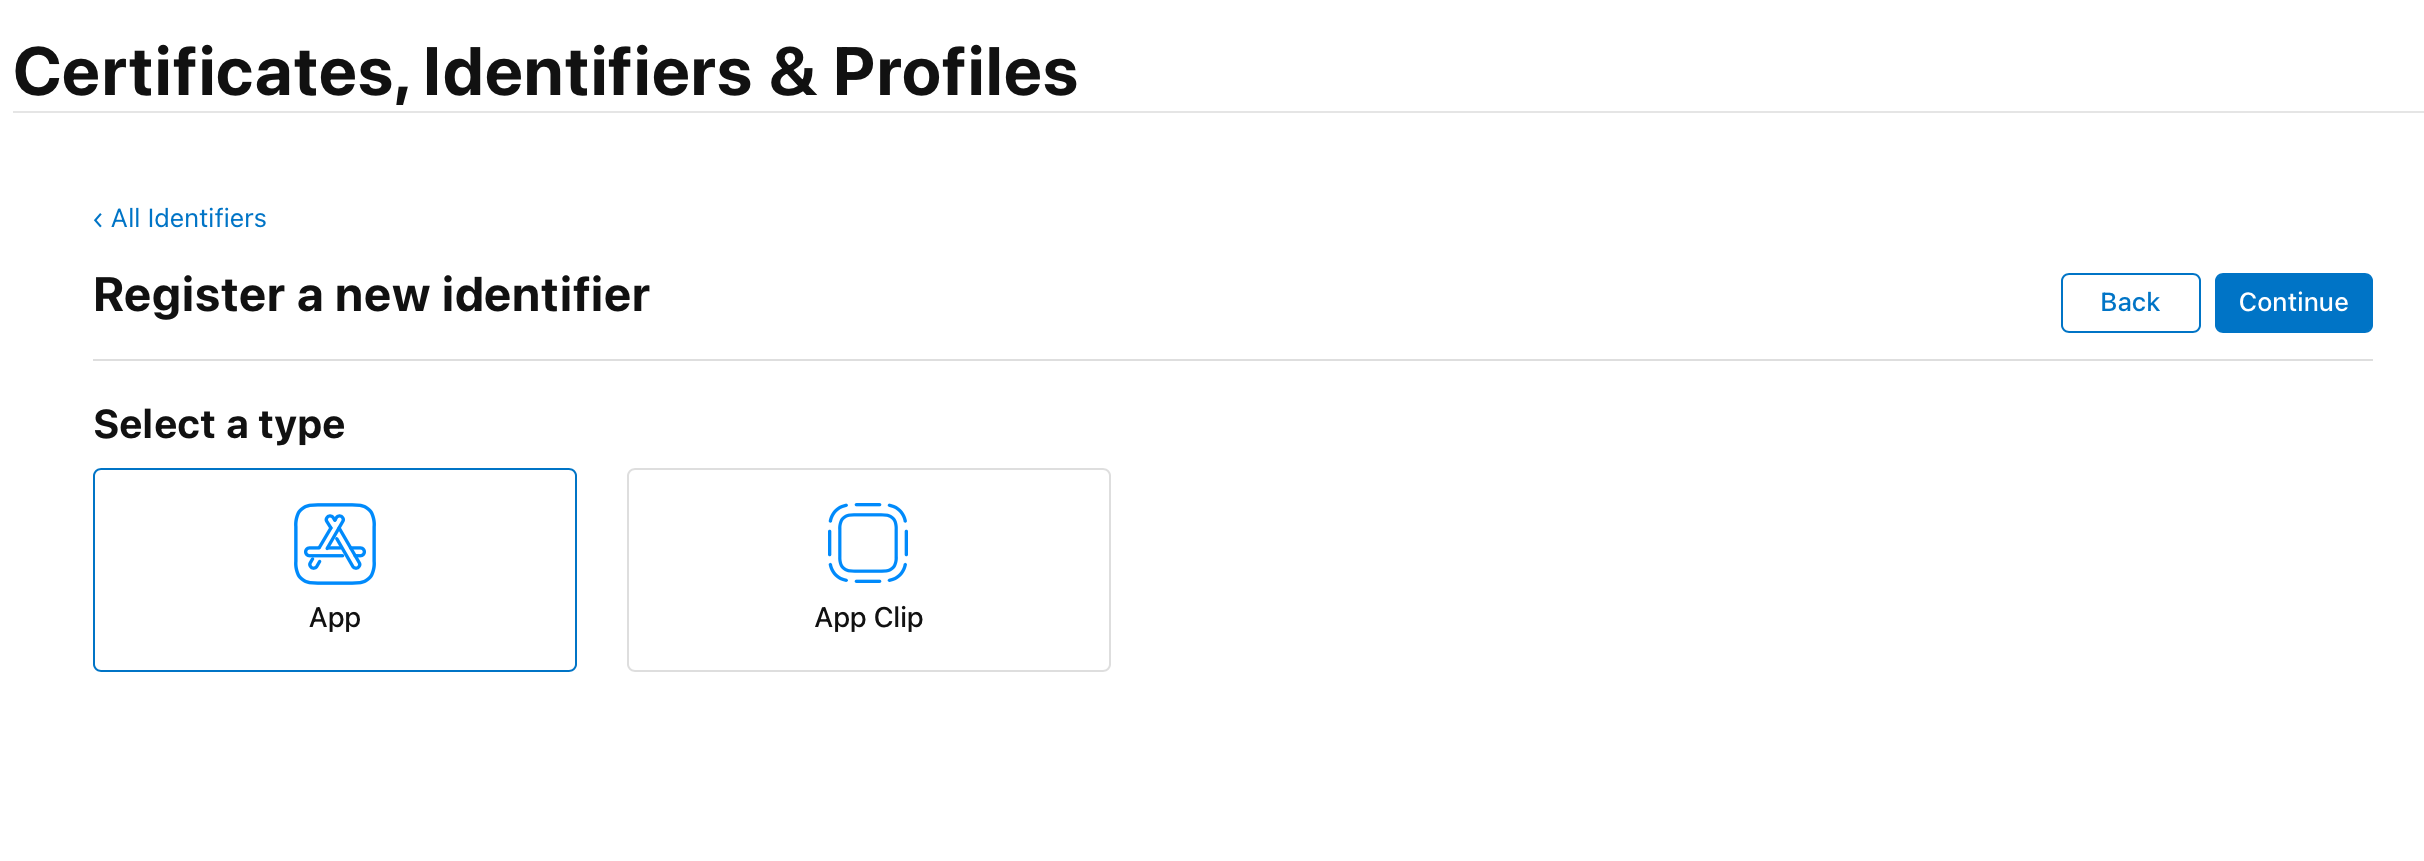
Choose App IDs and select App as type.
Fill in your App ID Description, which is anything you want, so make it helpful and descriptive. Enter your App IDs on the right. The first one should be named com.yourcompany.ios-app. You also need to enable only App Groups and Associated Domains, you shouldn’t activate any App services.
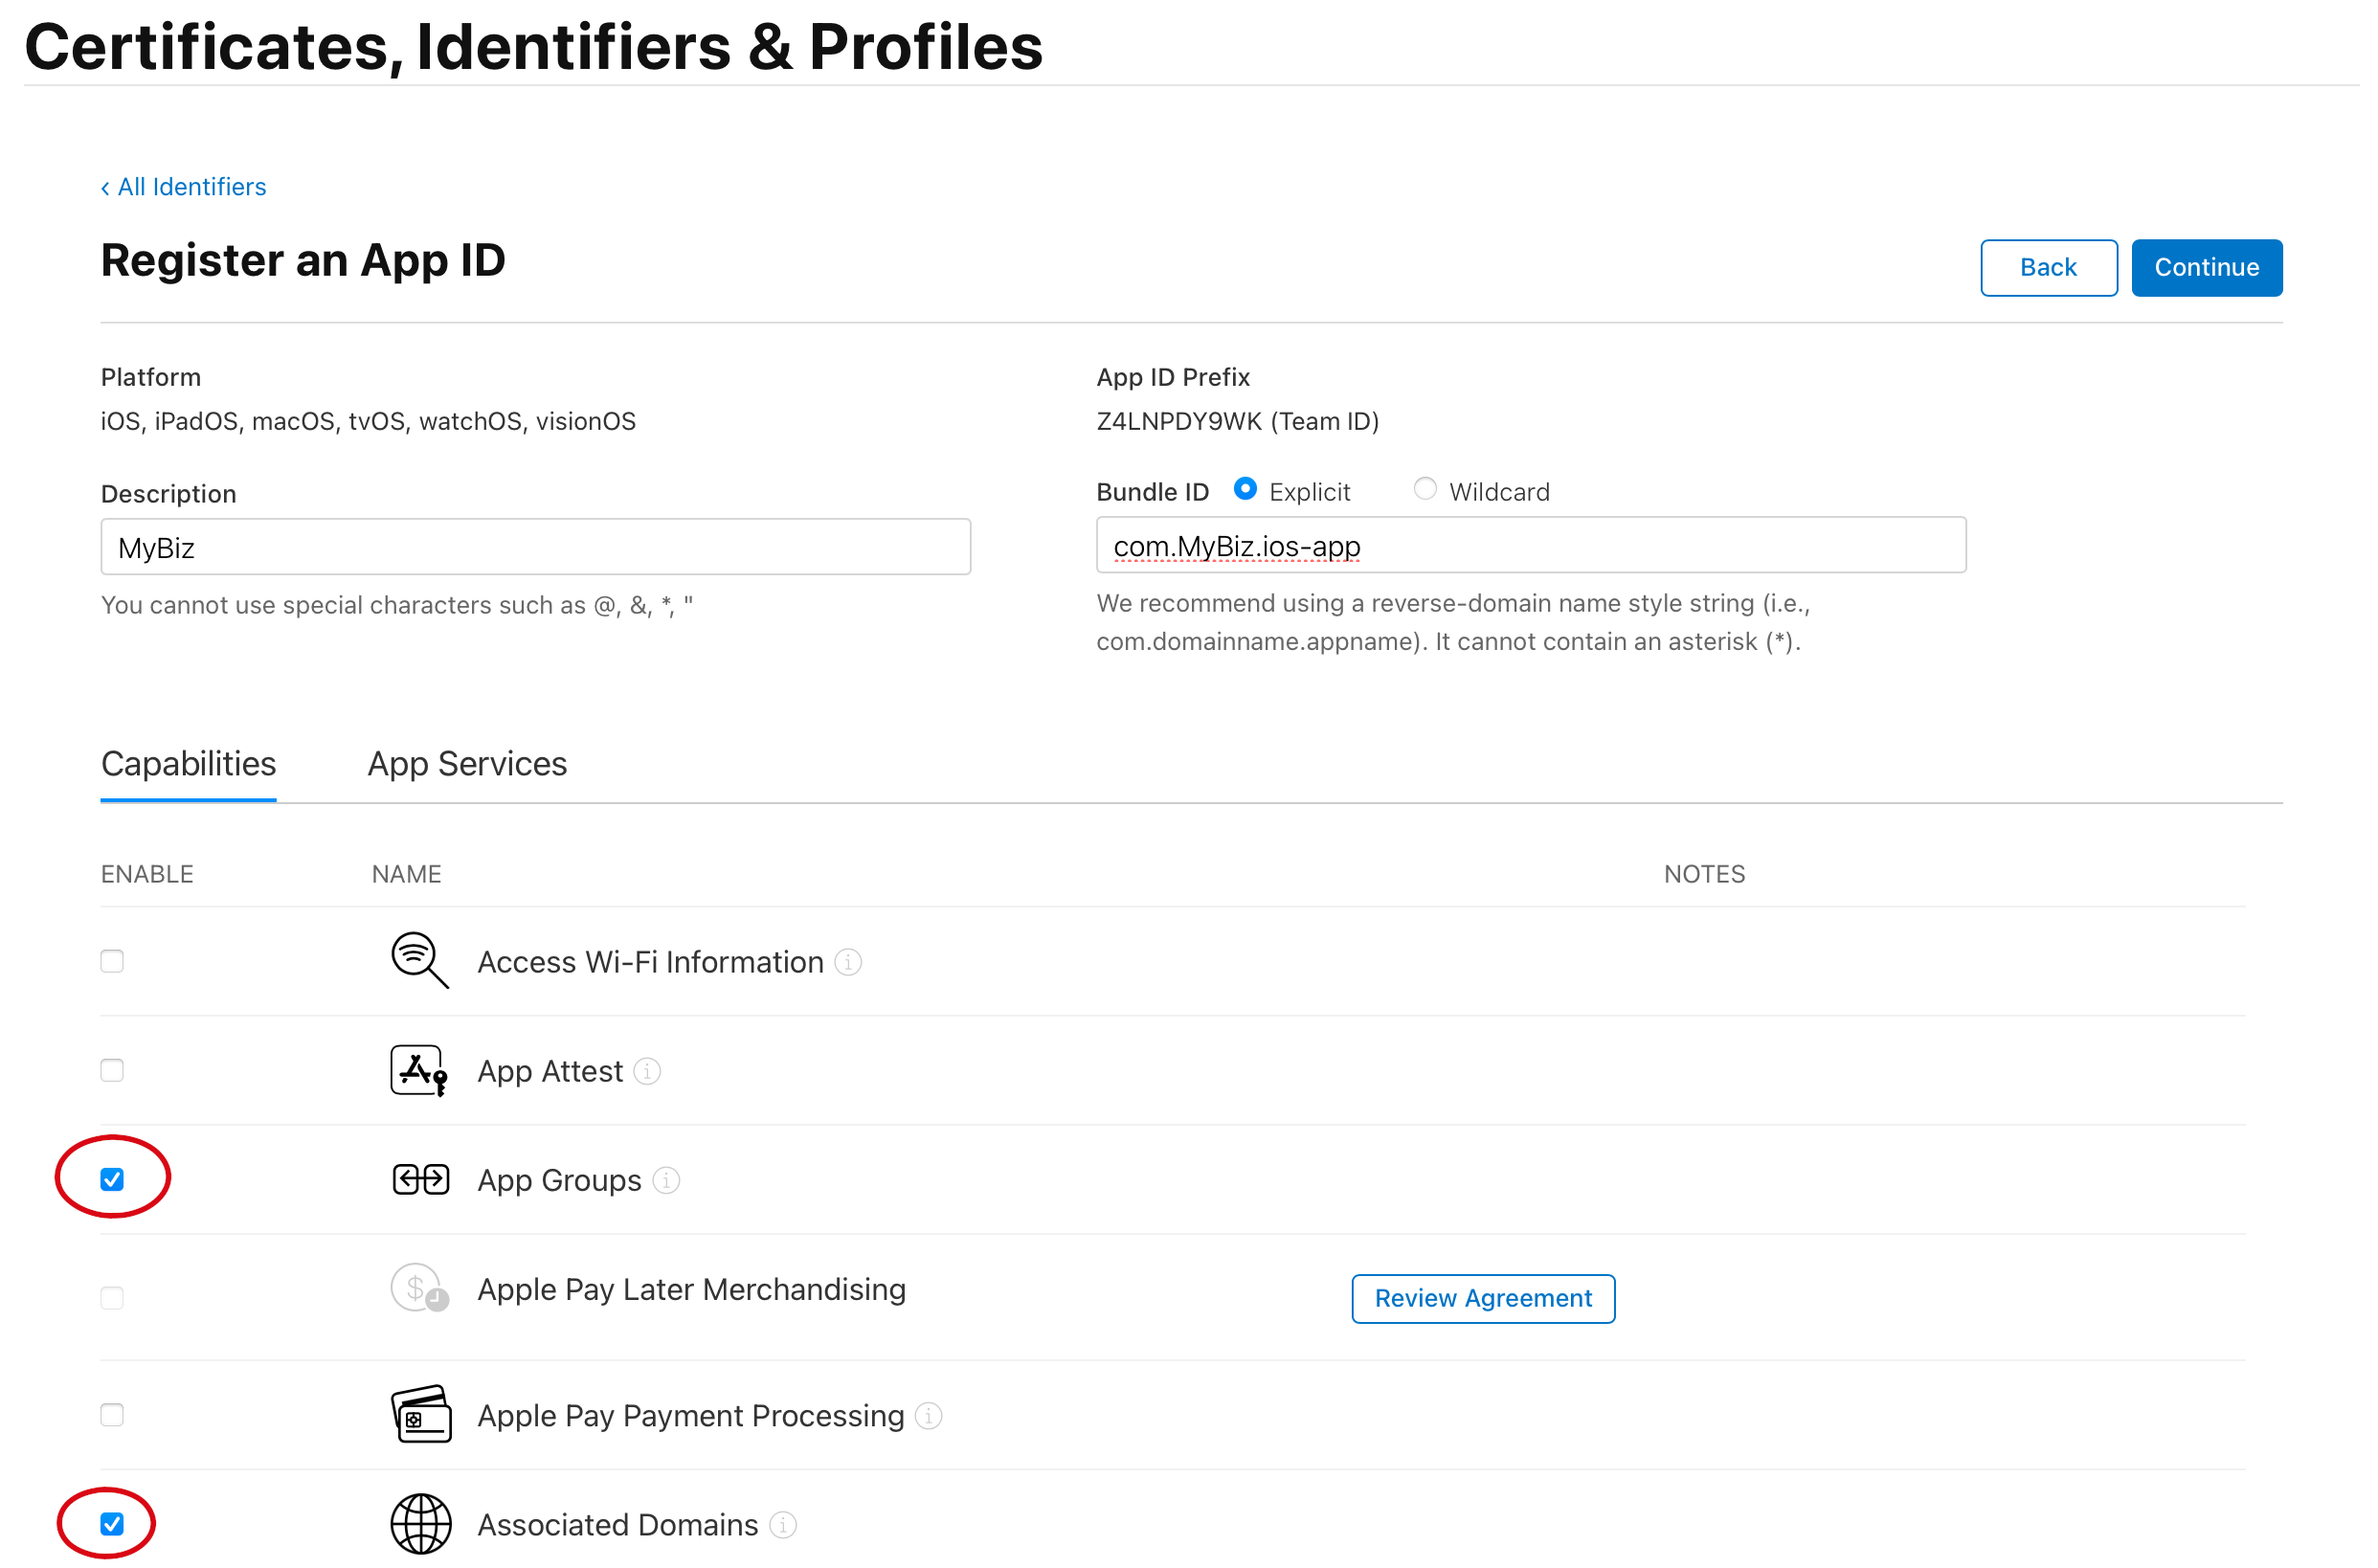
Create 4 other Identifiers with the same Settings (App Groups and Associated Domains enabled) and the following App IDs:
-
com.yourcompany.ios-app.ownCloud-File-Provider
-
com.yourcompany.ios-app.ownCloud-File-ProviderUI
-
com.yourcompany.ios-app.ownCloud-Intent
-
com.yourcompany.ios-app.ownCloud-Share-Extension
Afterwards, you should have five identifiers in total with names similar to the following:
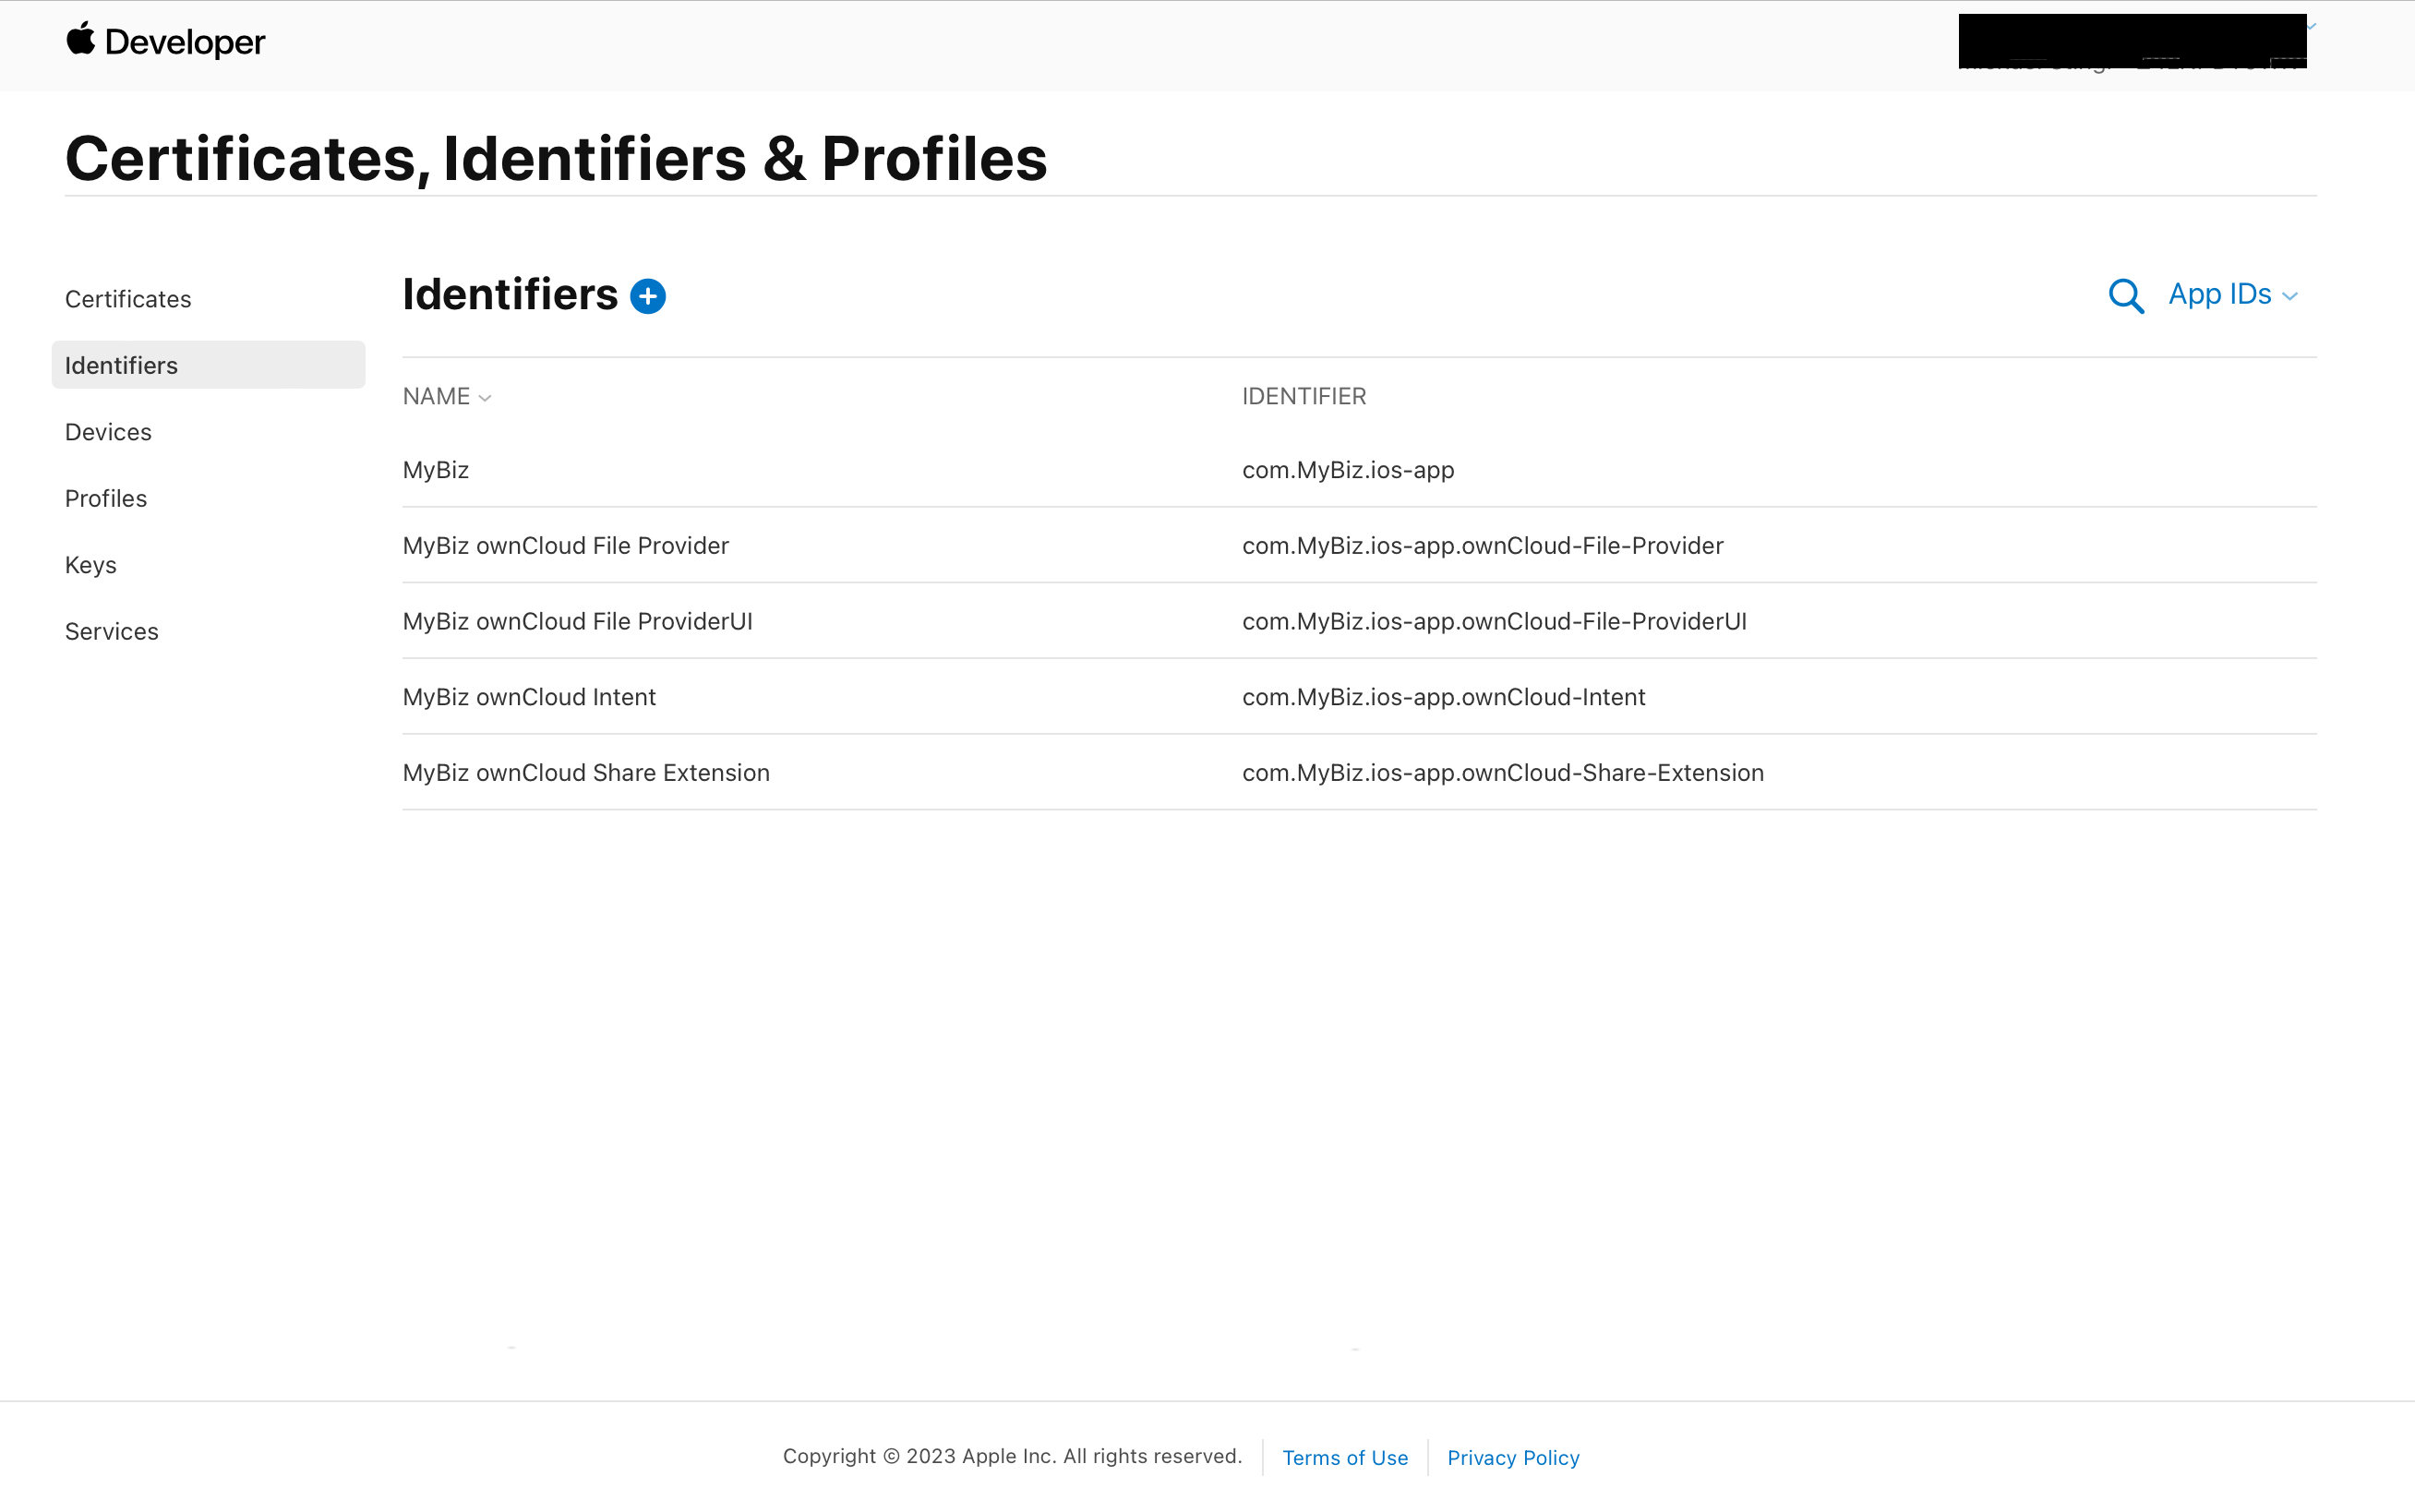
Create App Group
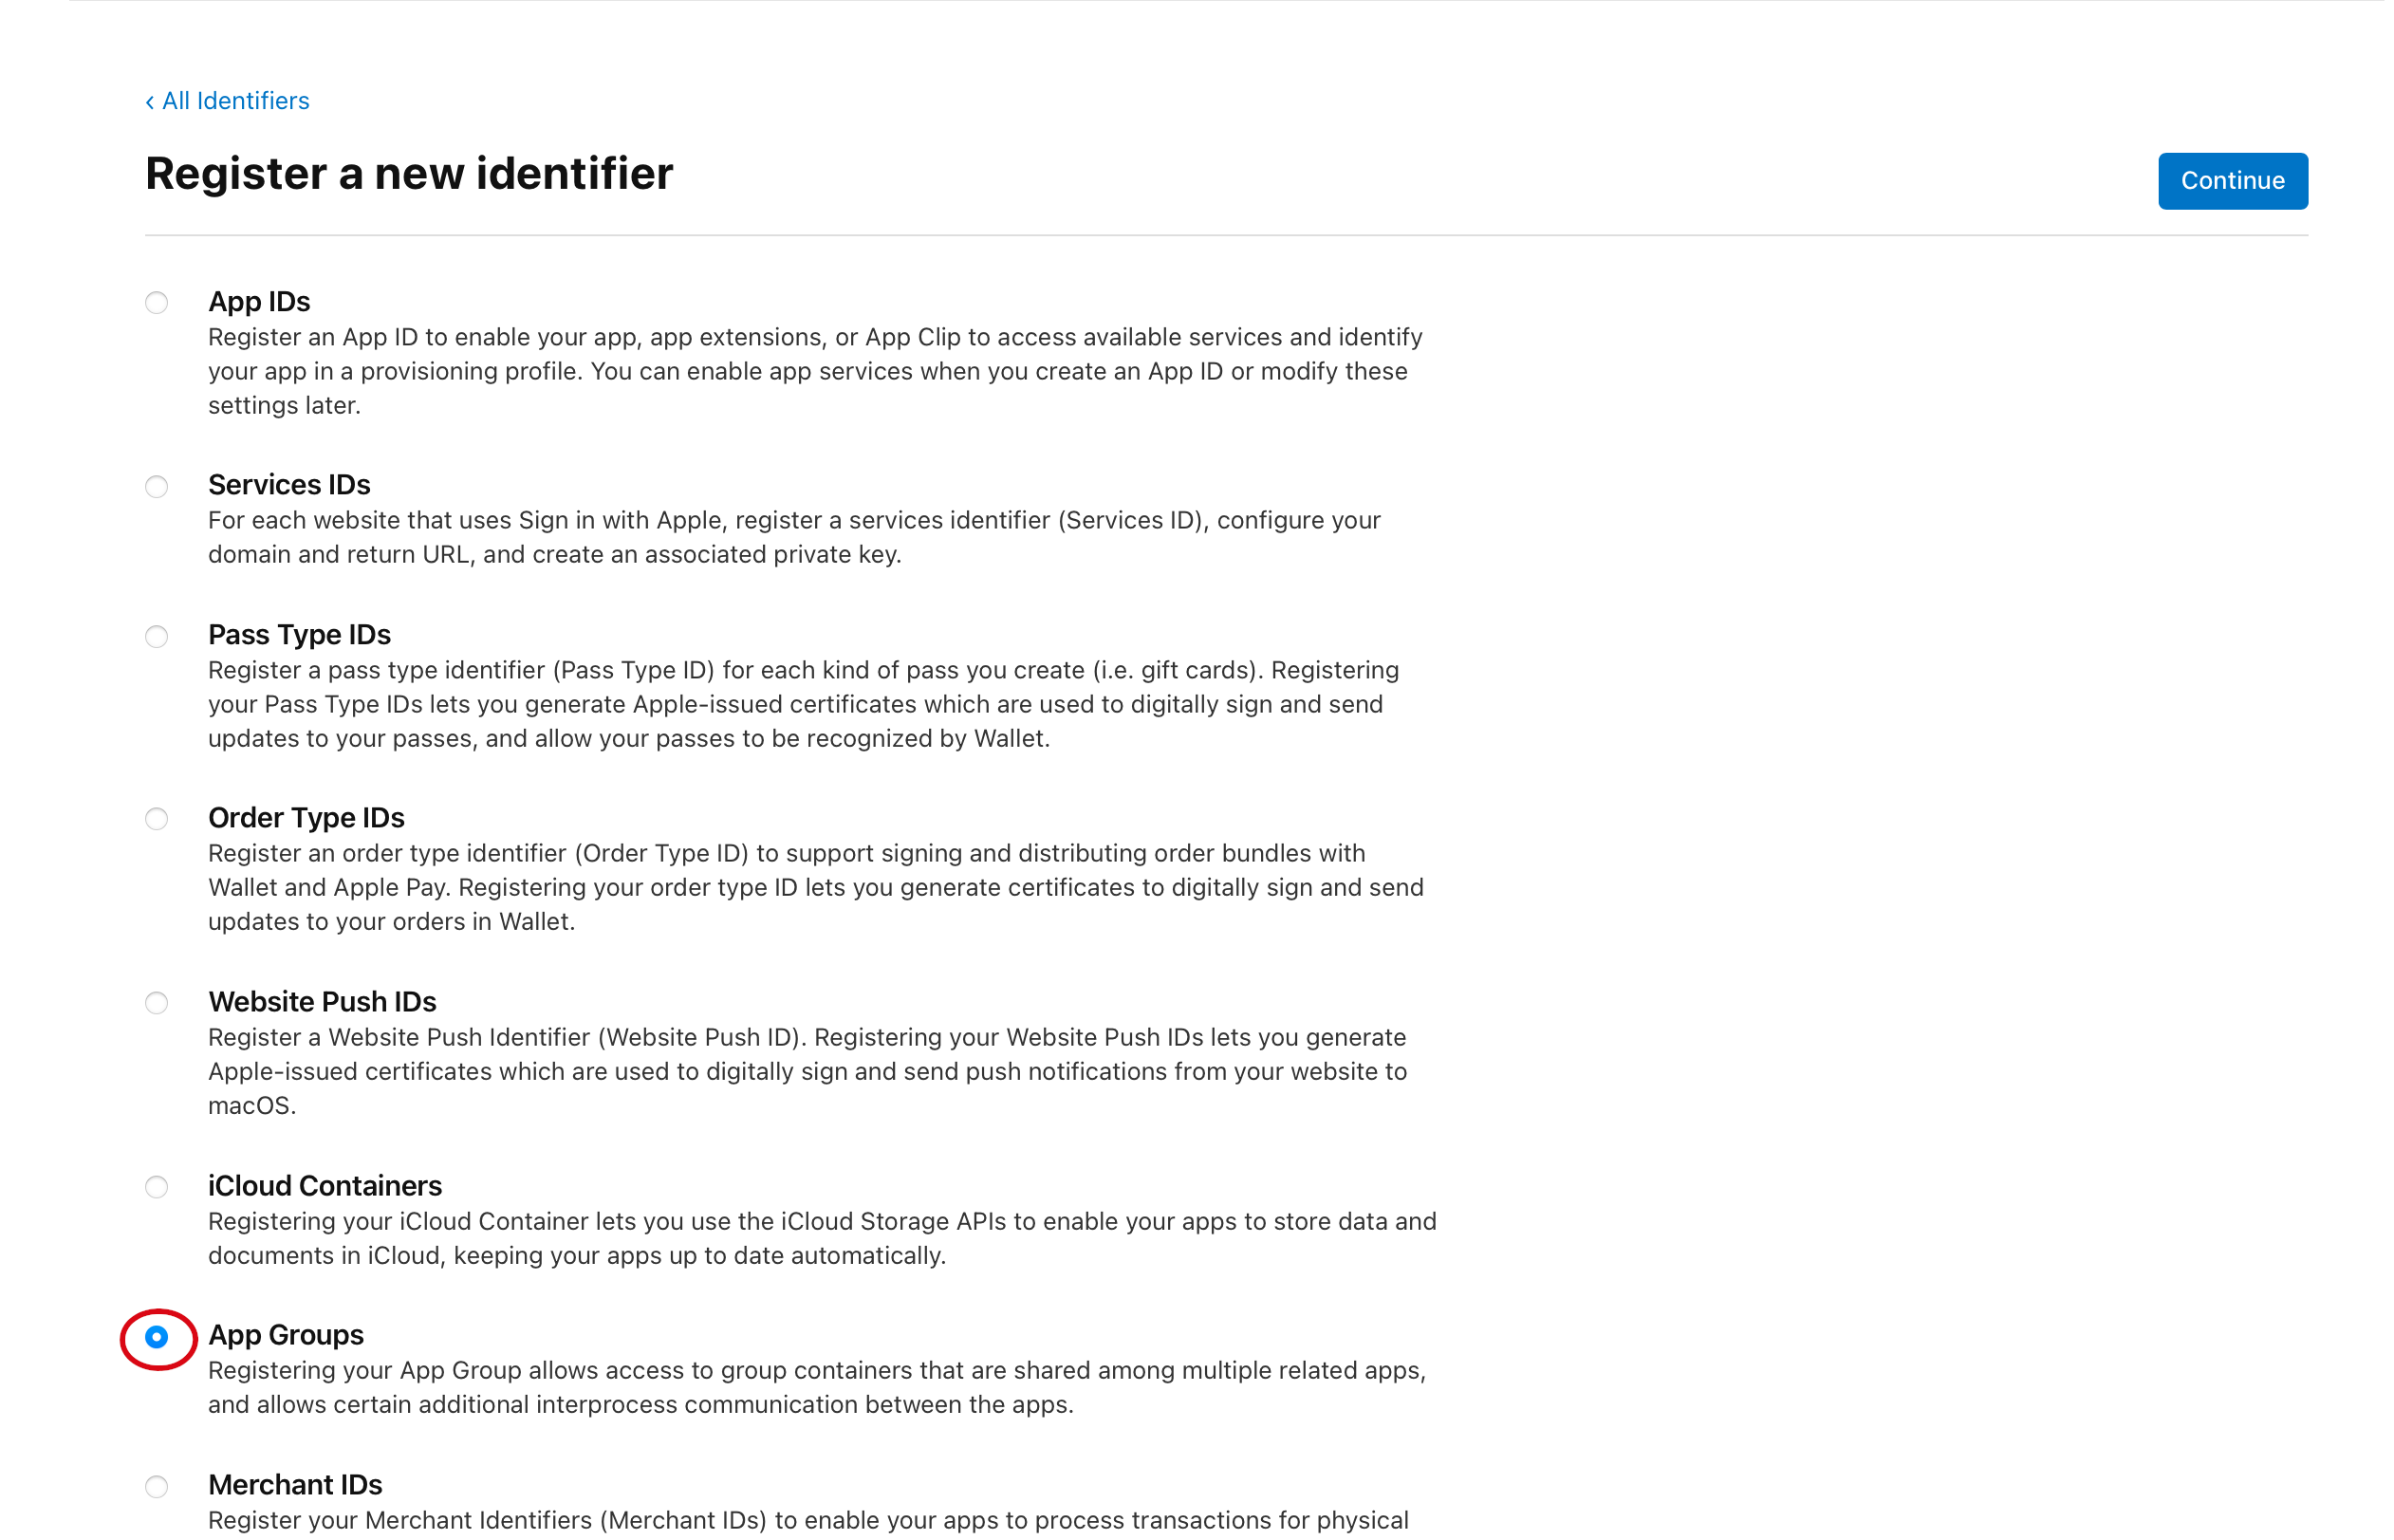
The next step is to create an App Group and put your App ID in it. Press the plus button again but this time select App Groups.
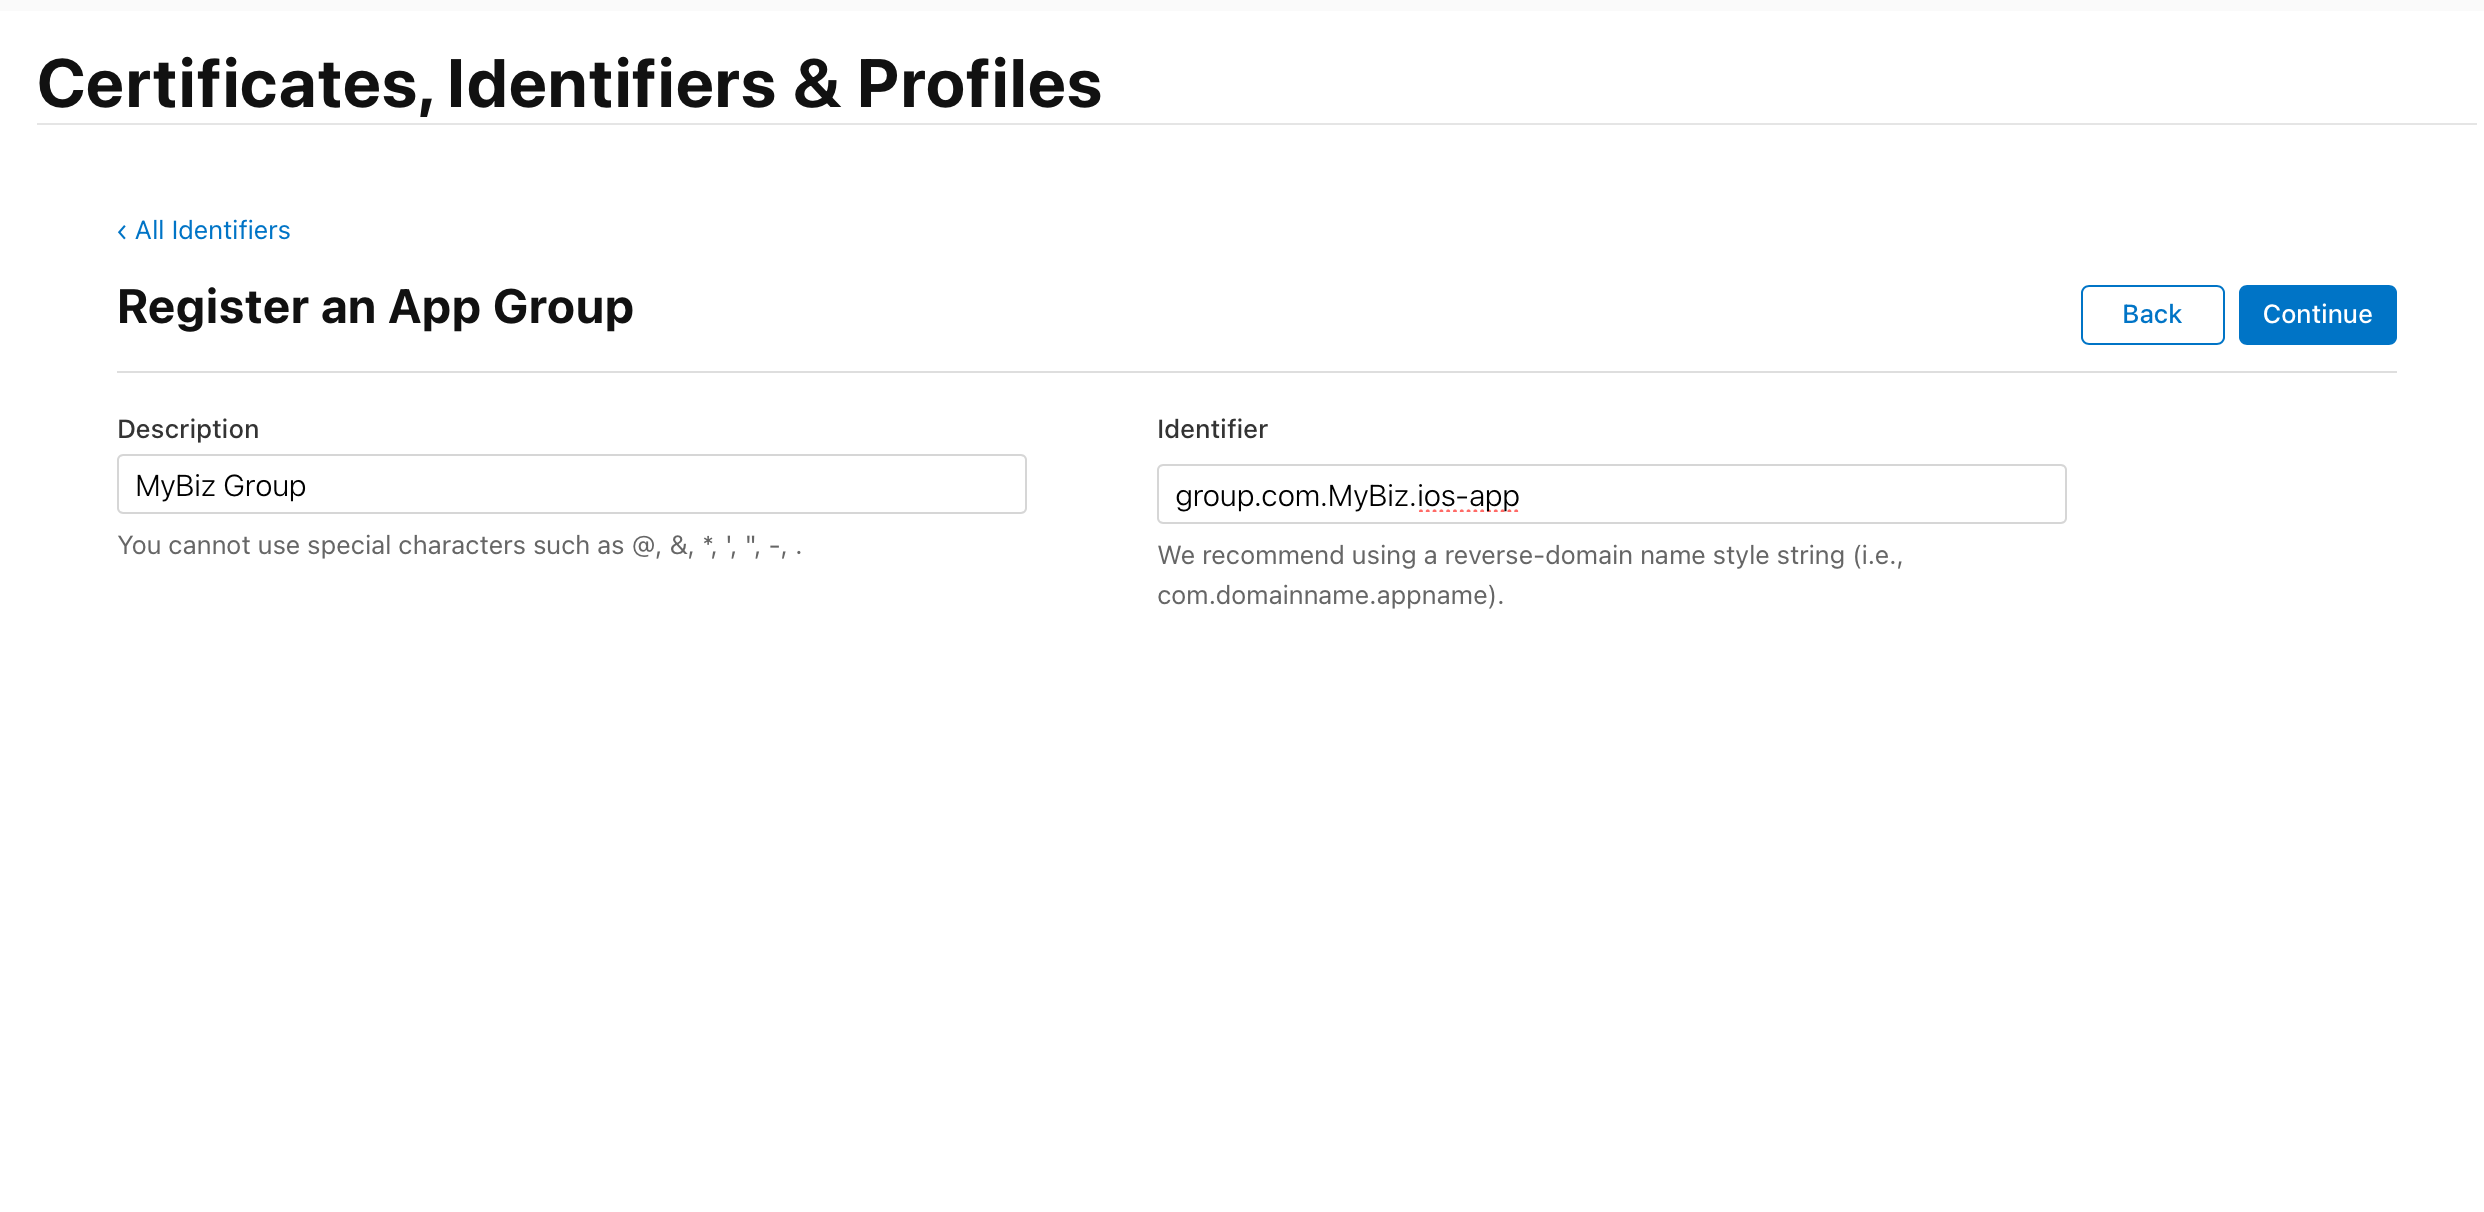
Give a fitting description and add Identifier in the format group.com.yourcompany.ios-app. Then click Continue.
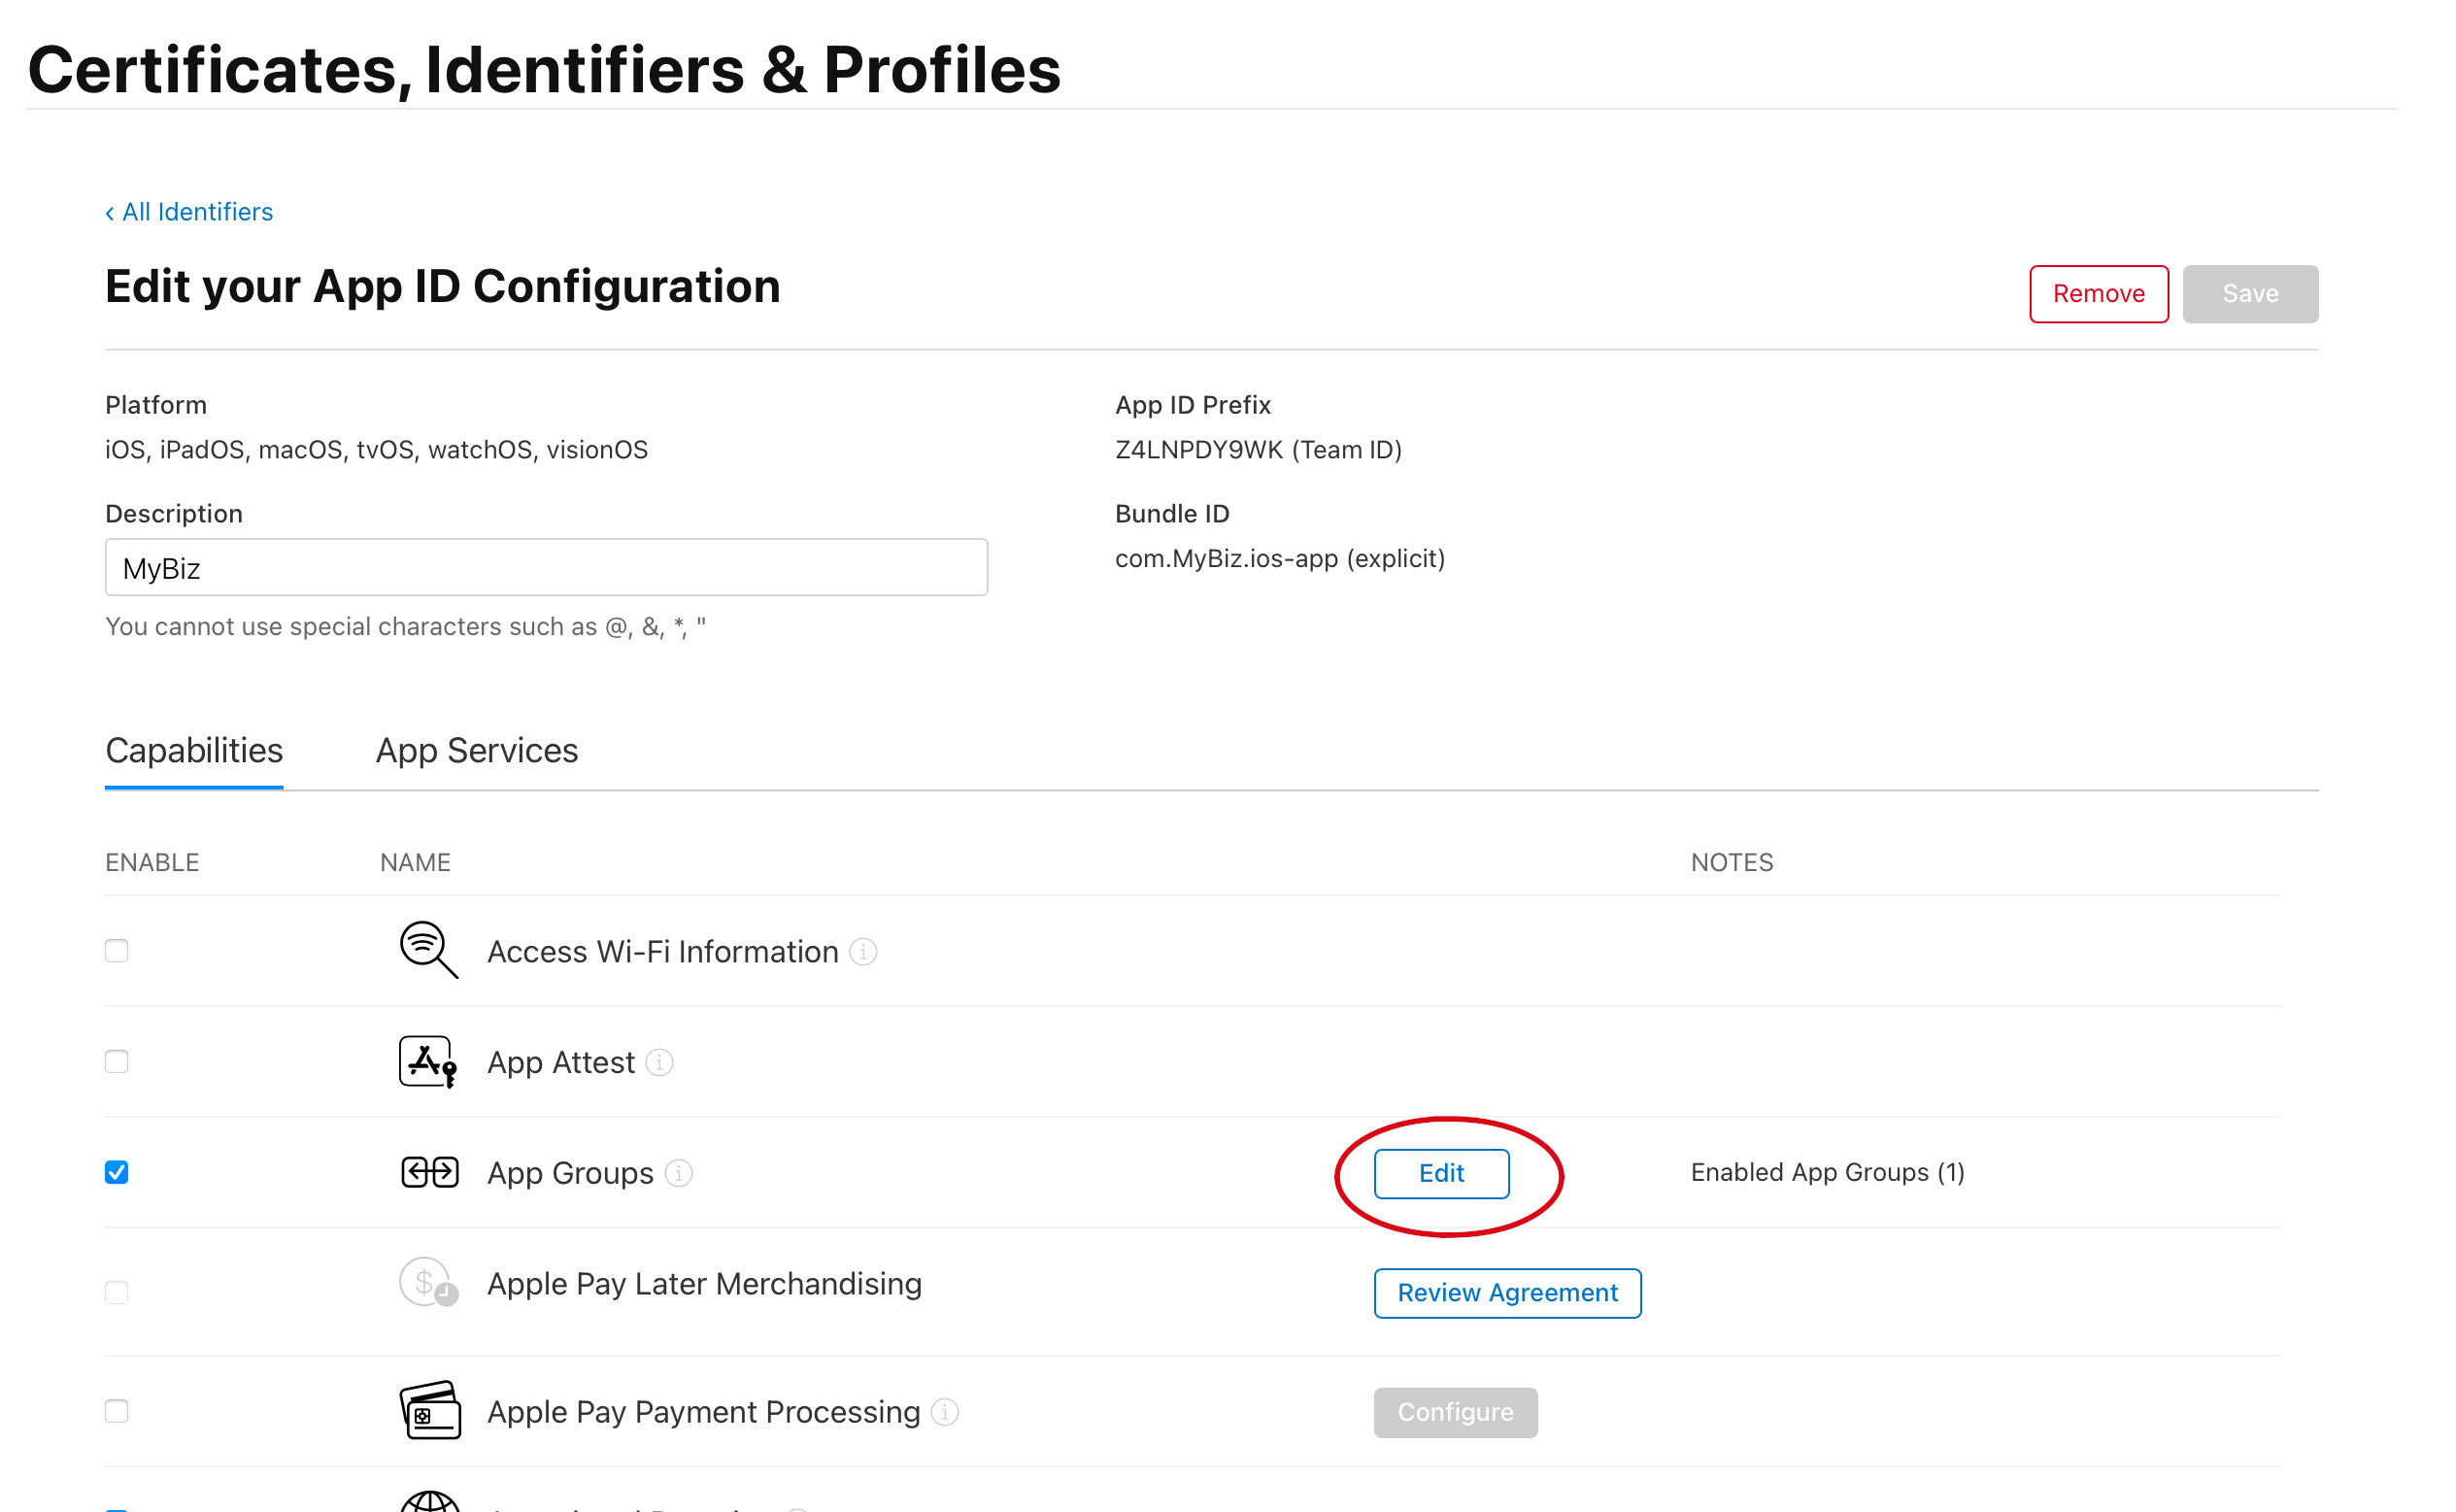
Now click on each of your five App IDs to add them to your App Group by clicking Edit and selecting the App Group you created.
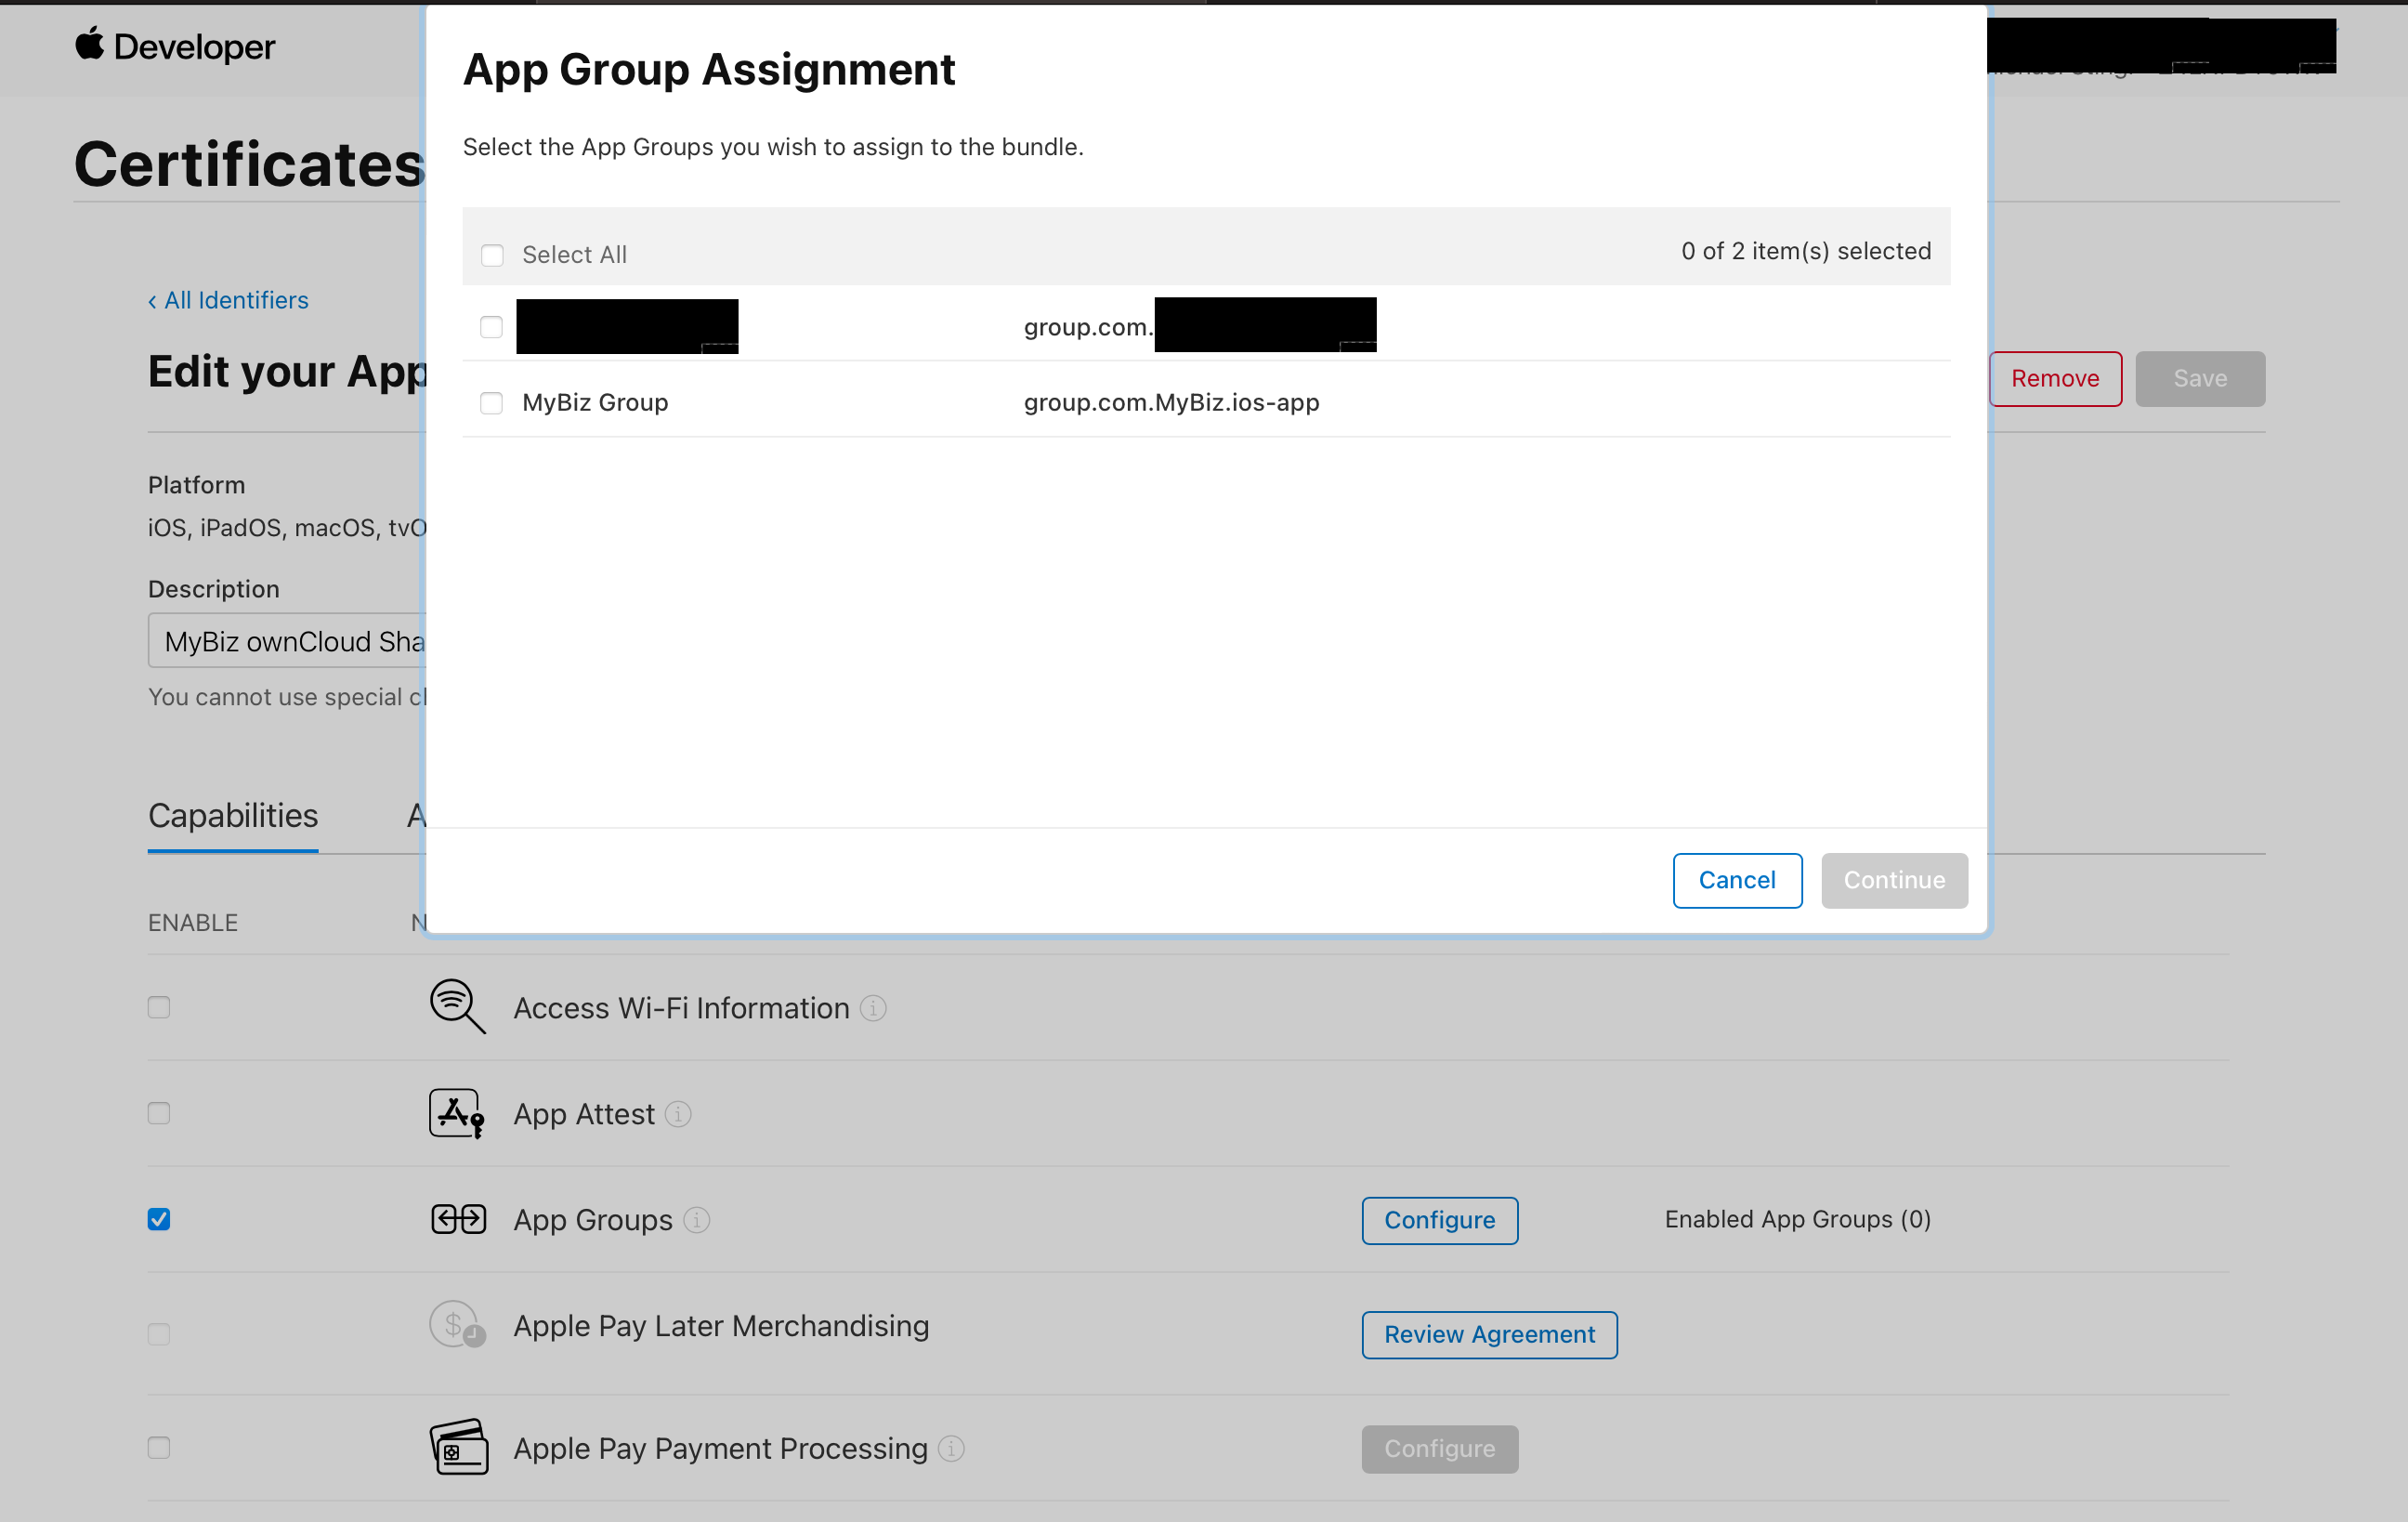
In the end, you should have five App IDs, all added to the App Group you created.