Manage Users Accounts
Introduction
This guide describes how to manage user accounts in your Android App. Initially the path to the accounts section isn’t visible and you have to open it first.
Open the Accounts Section
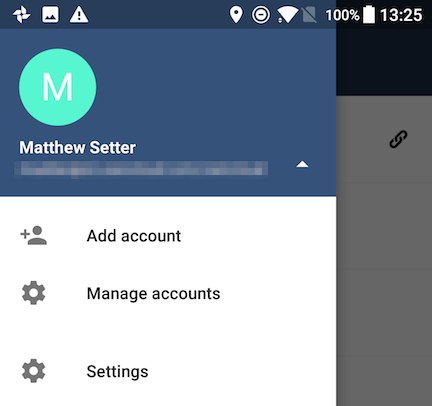
To open the accounts section, first click the down arrow, in the user details section, which will replace the "All Files" and "Uploads" buttons with "Add account" and "Manage accounts".

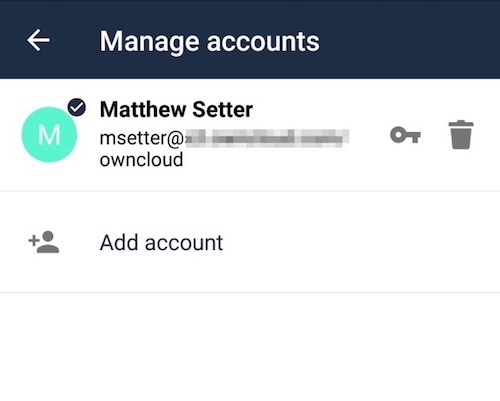
Then, click Manage accounts. From there, you can see all of the currently active user accounts, along with a button to add a new account.
Adding Accounts
To add a new account is identical to creating the first account. Click Add account, and then follow the instructions in Connecting to Your ownCloud Server.
Viewing Accounts
After clicking Manage accounts, you will see a list of the currently active accounts in the application, as in the screenshot below. Each entry in the list has shortcuts to:
-
View the user’s files
-
Change the user’s password
-
Remove the account

Removing Accounts & Logging Out
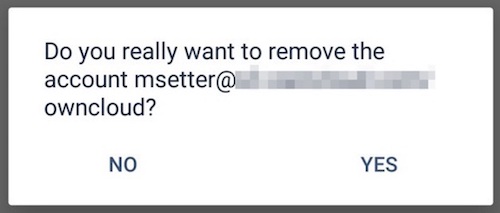
To remove an account, click the rubbish bin icon, next to the key icon. This will display a confirmation dialog, asking if you want to remove the account. If you click Yes, the account will be removed.
This action also logs you out of the server and deletes the database with the list of files. However, any files downloaded onto the device prior to removal will still be there afterwards. You can find them in the public partition.

| When removing an account, the files related to that account are removed automatically. This is also true when uninstalling the app which removes all accounts with their data. |
Change User Passwords
To change a user’s password, click the key icon, next to the user’s details. This will display the user details page, with the ownCloud server URI and user account, pre-filled. Enter a new password, and click Connect, and the password will be updated.

If you want extra security, please refer to the Passcode Locks & Pins section.