Example Setup Using Microsoft Azure
Introduction
Microsoft Azure Active Directory (Azure AD) is Microsoft’s multi-tenant cloud-based directory and identity management service. This document describes how to integrate Microsoft Azure Active Directory (Azure AD) as an identity provider (IdP) by configuring OpenID Connect (OIDC) in both Single Sign‑On and Azure AD.
Setup and Configuration
The sections below will explain these areas and provide configuration examples using Microsoft Azure Active Directory (Azure AD) as the external Identity Provider.
Configure Microsoft Azure AD
Follow these steps to configure Microsoft Azure AD for use with OpenID Connect (OIDC):
-
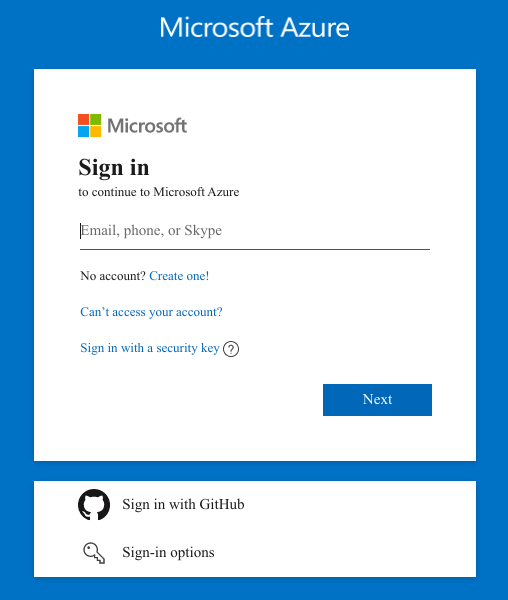
Login to Azure.
-
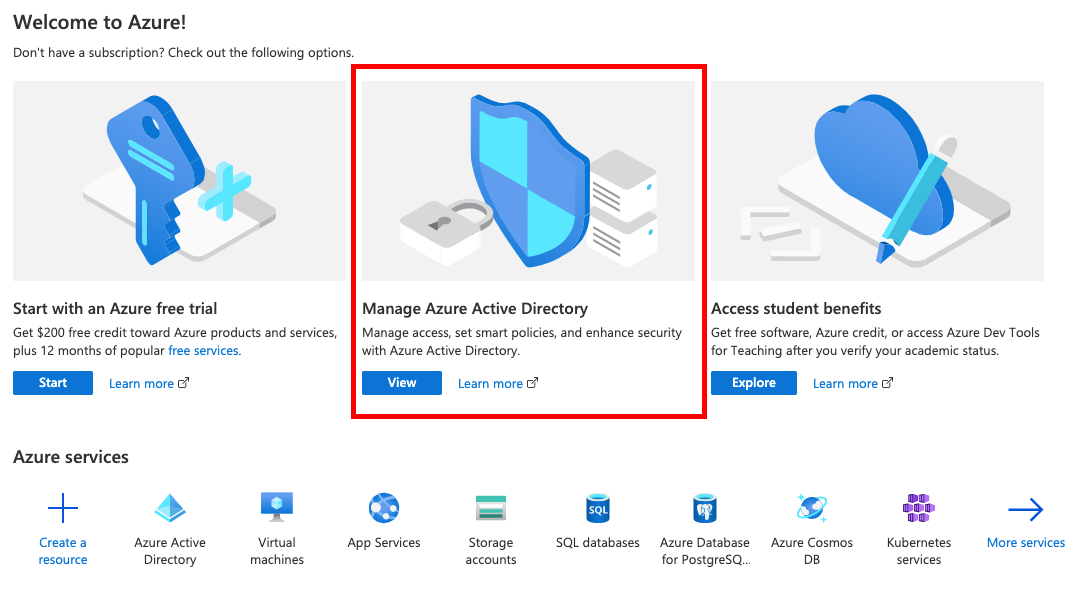
Go to Manage Azure Active Directory.
-
Then go to and note your
tenant IDfor later use.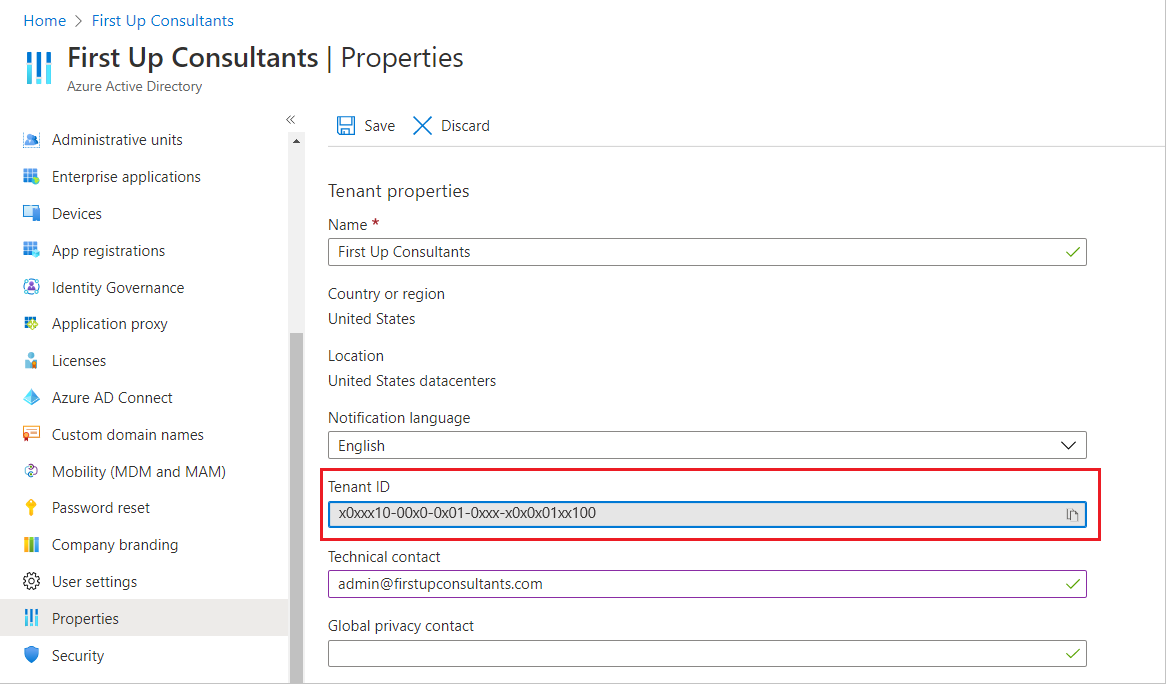
-
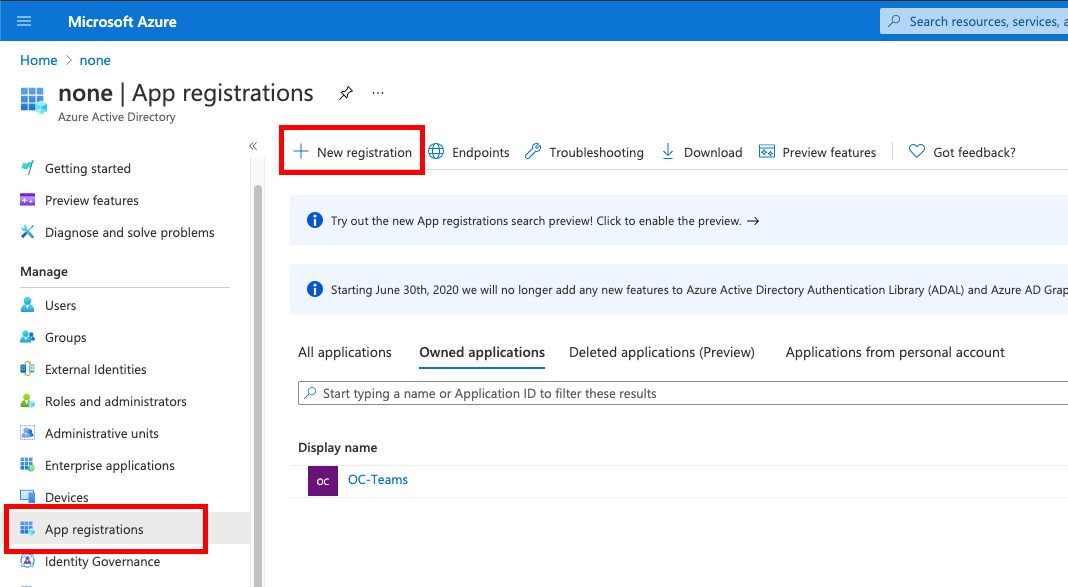
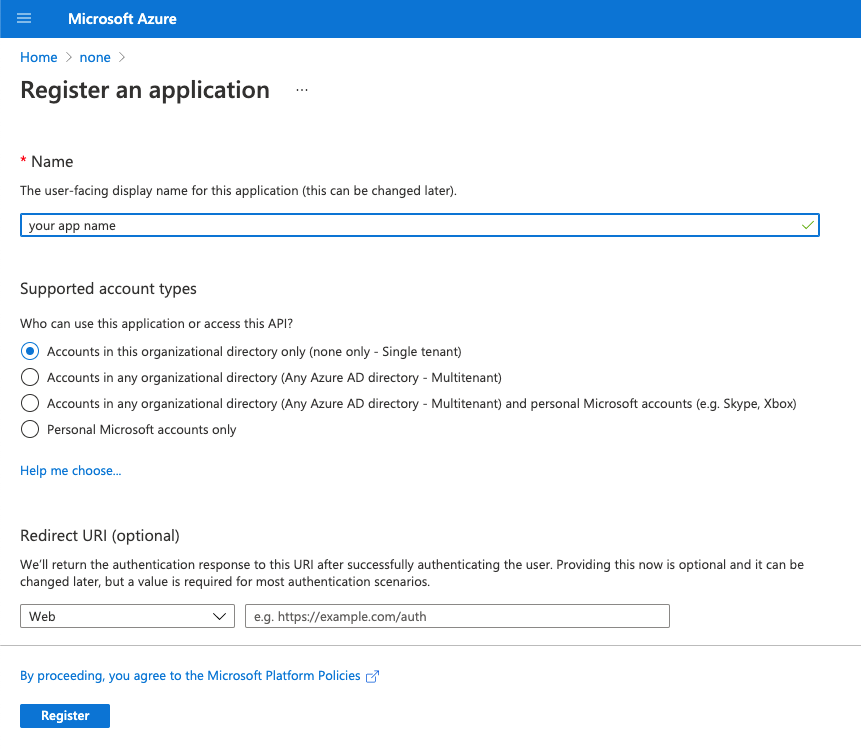
Then go to .
-
Provide all required information.
-
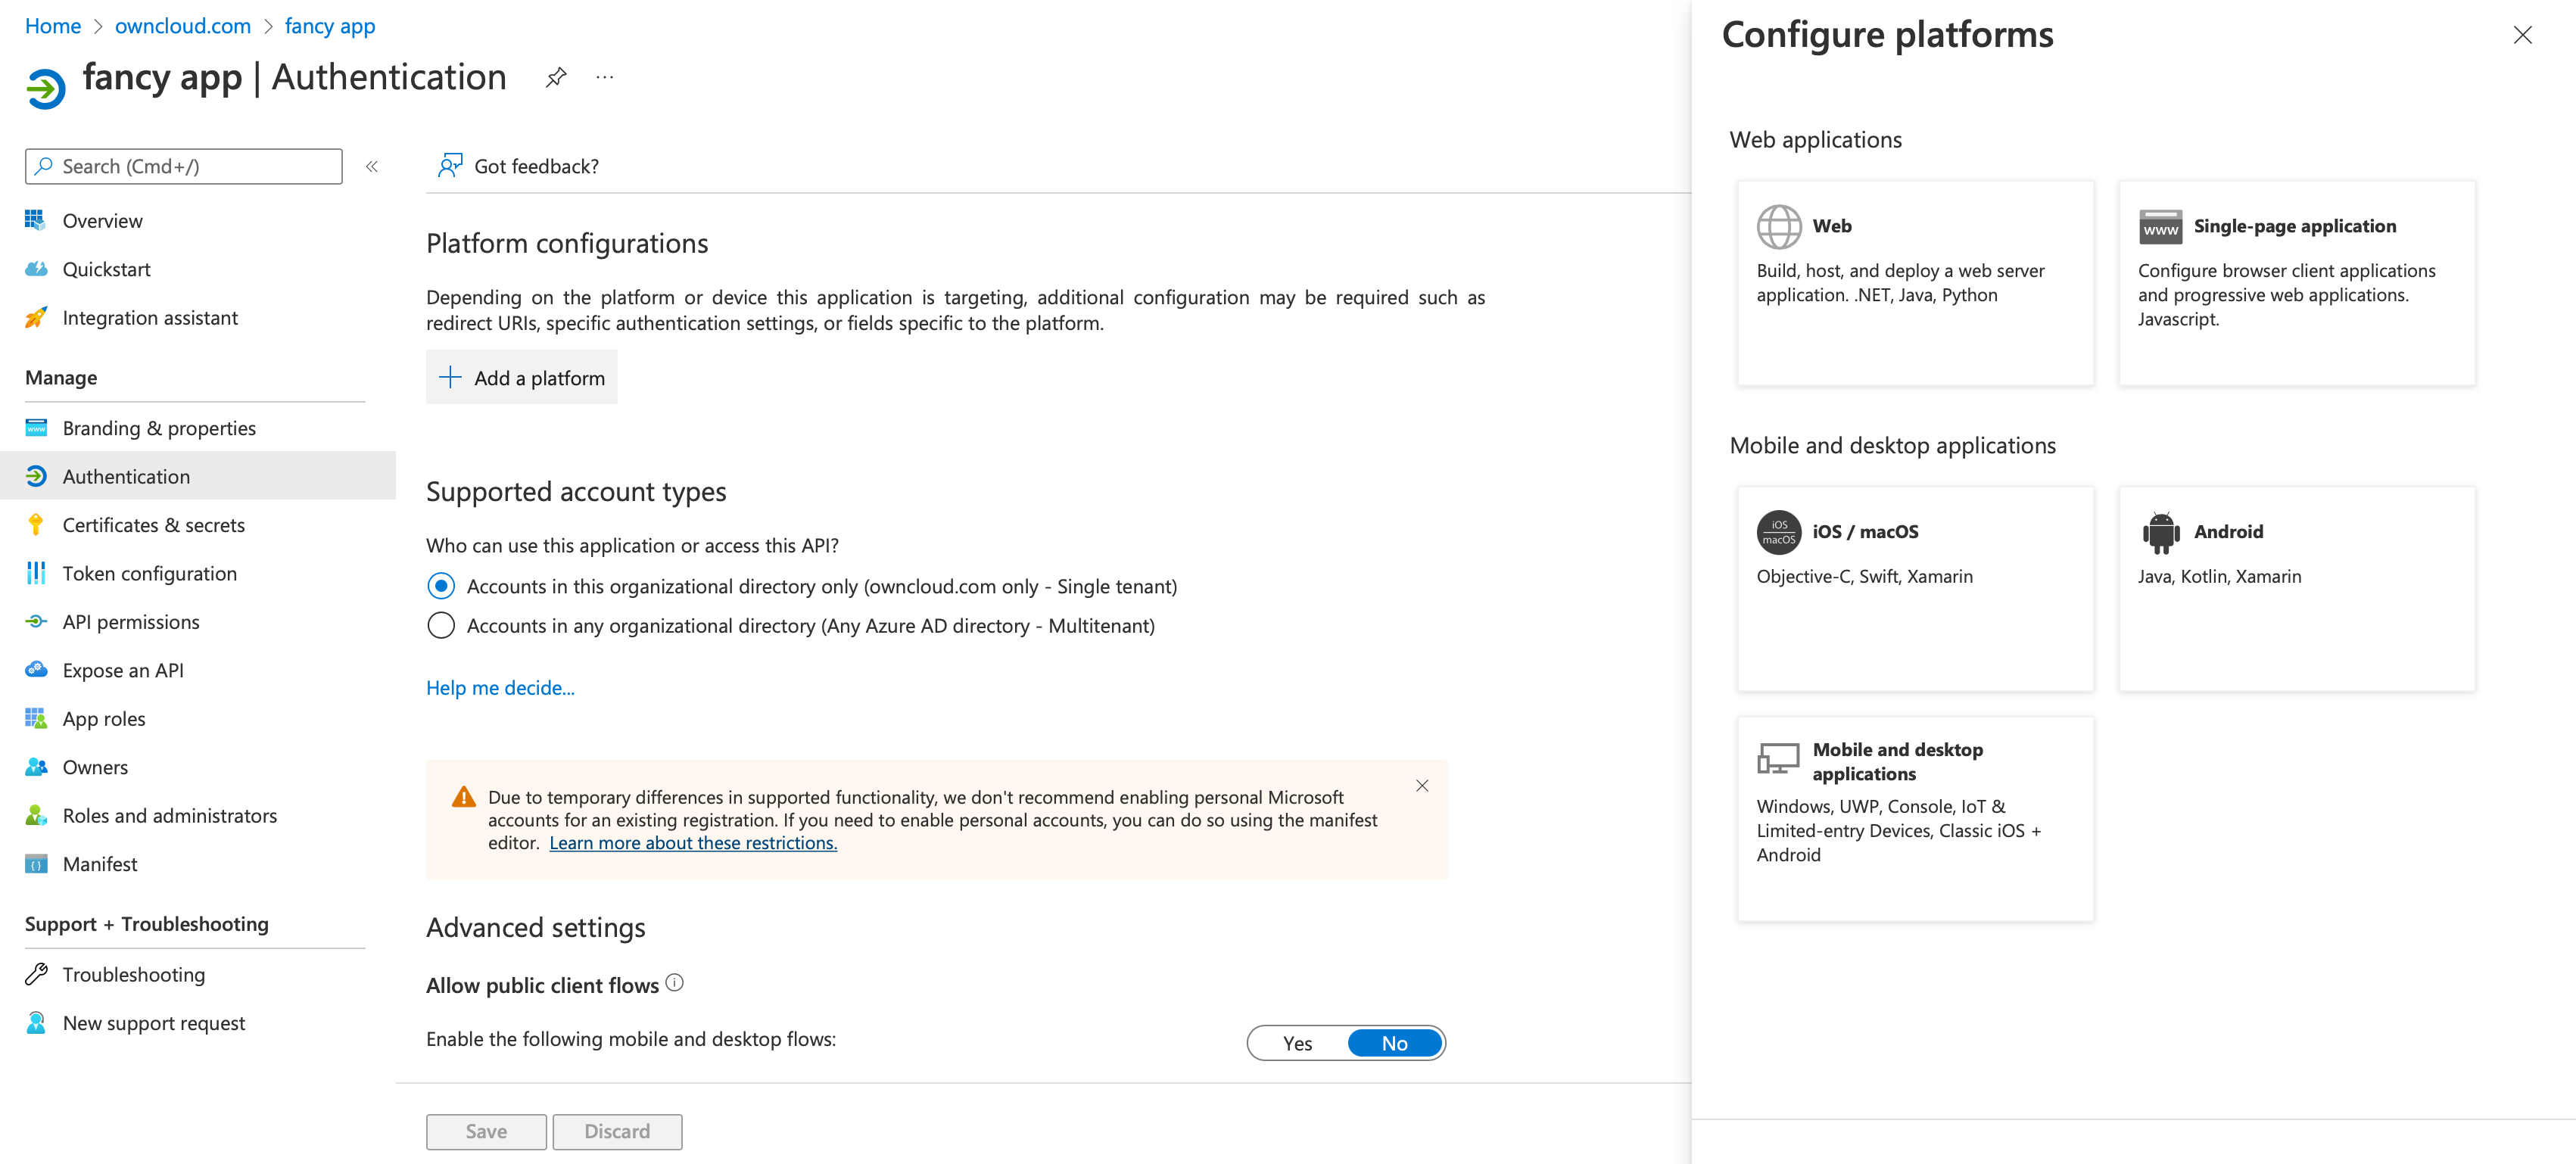
Go to and select Web in Configure Platforms.
-
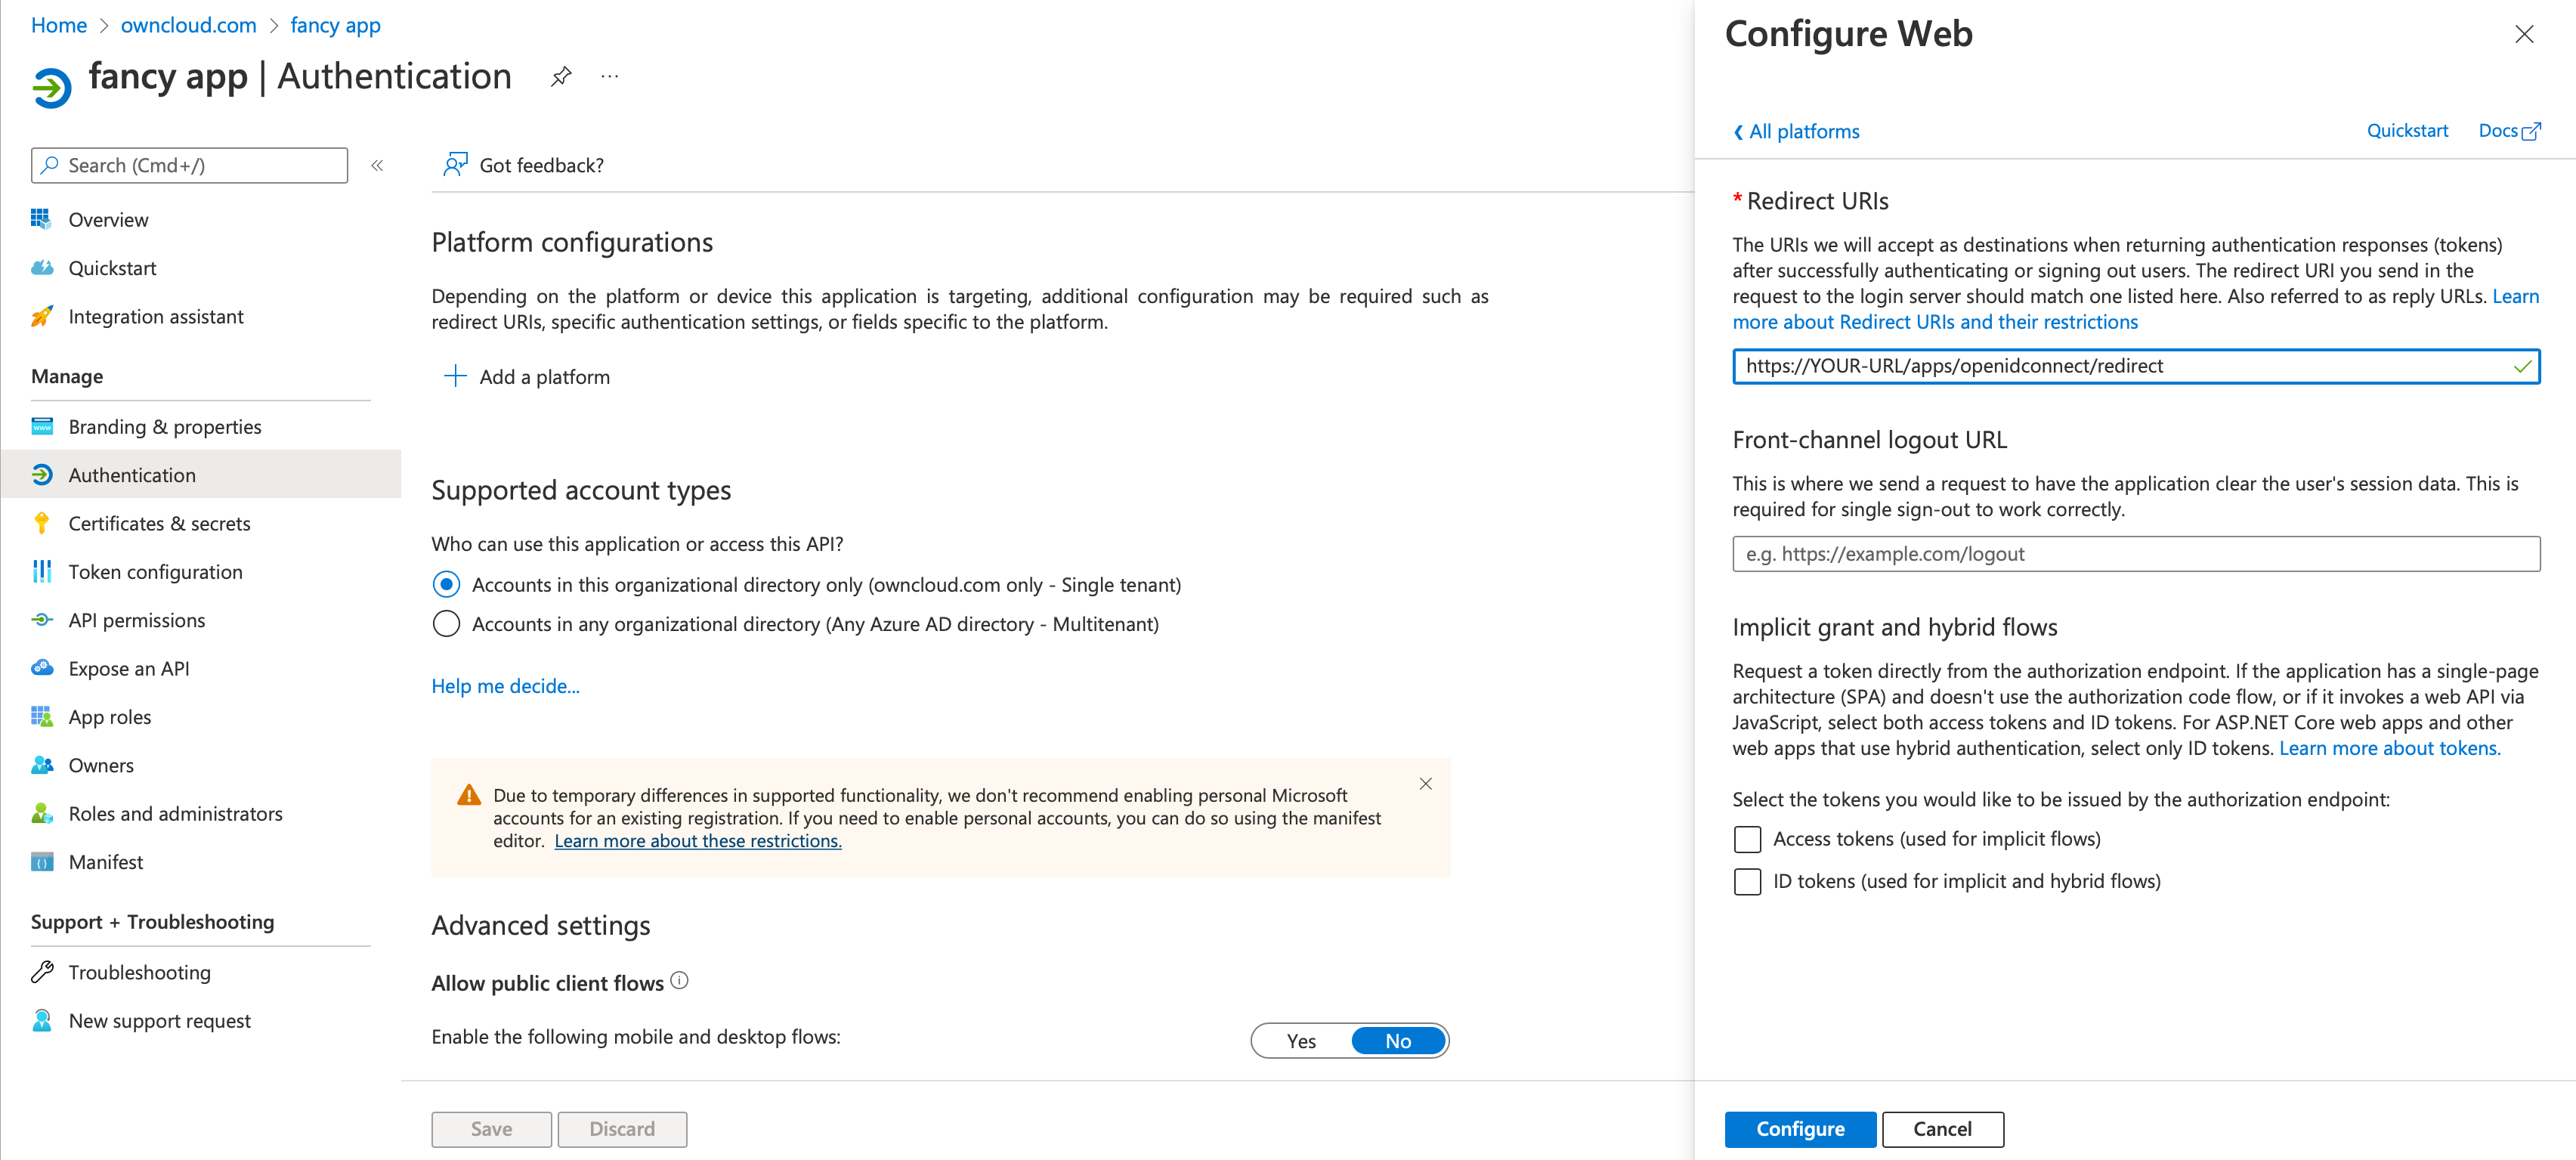
Go to and setup your Redirect URI.
-
Go to and setup the
client secretfor your app.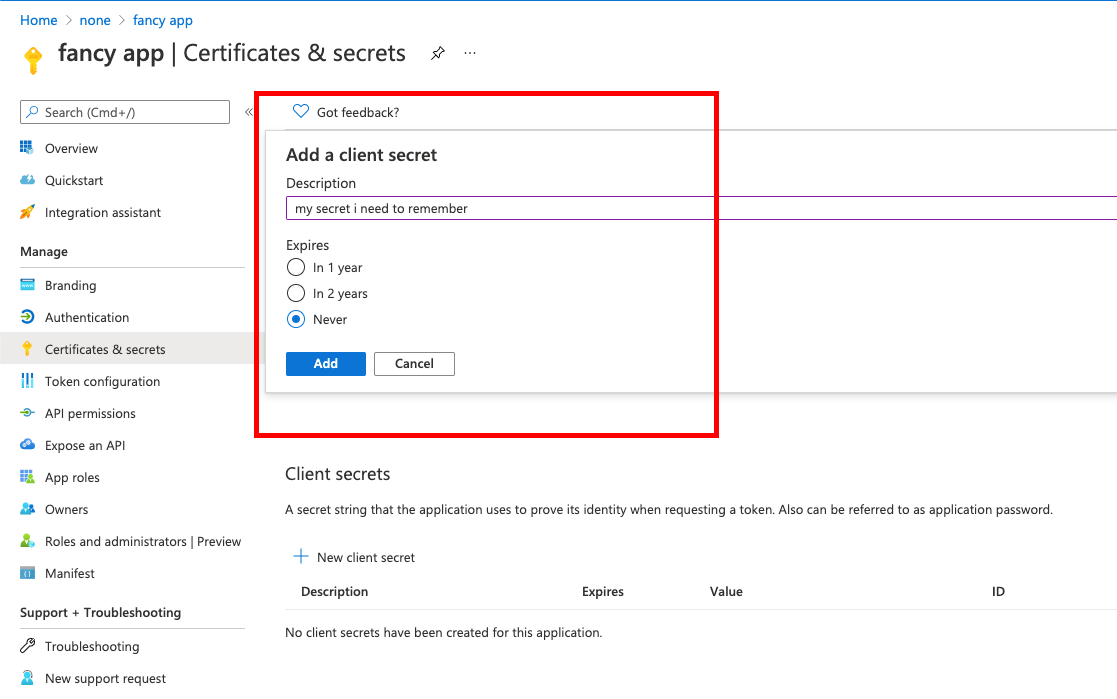
-
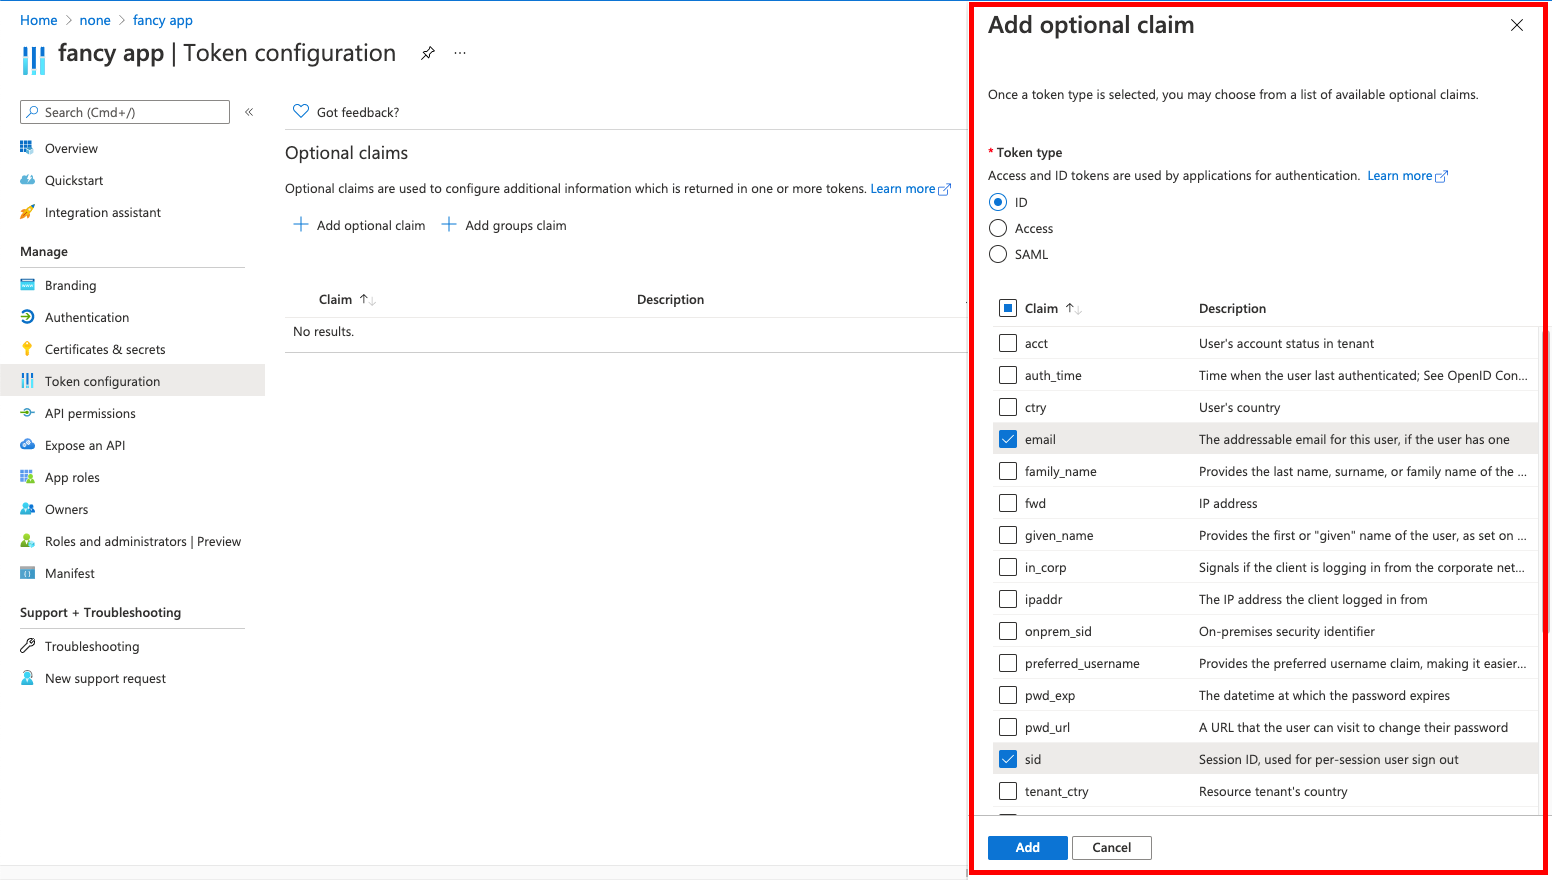
Go to and setup the claims.
-
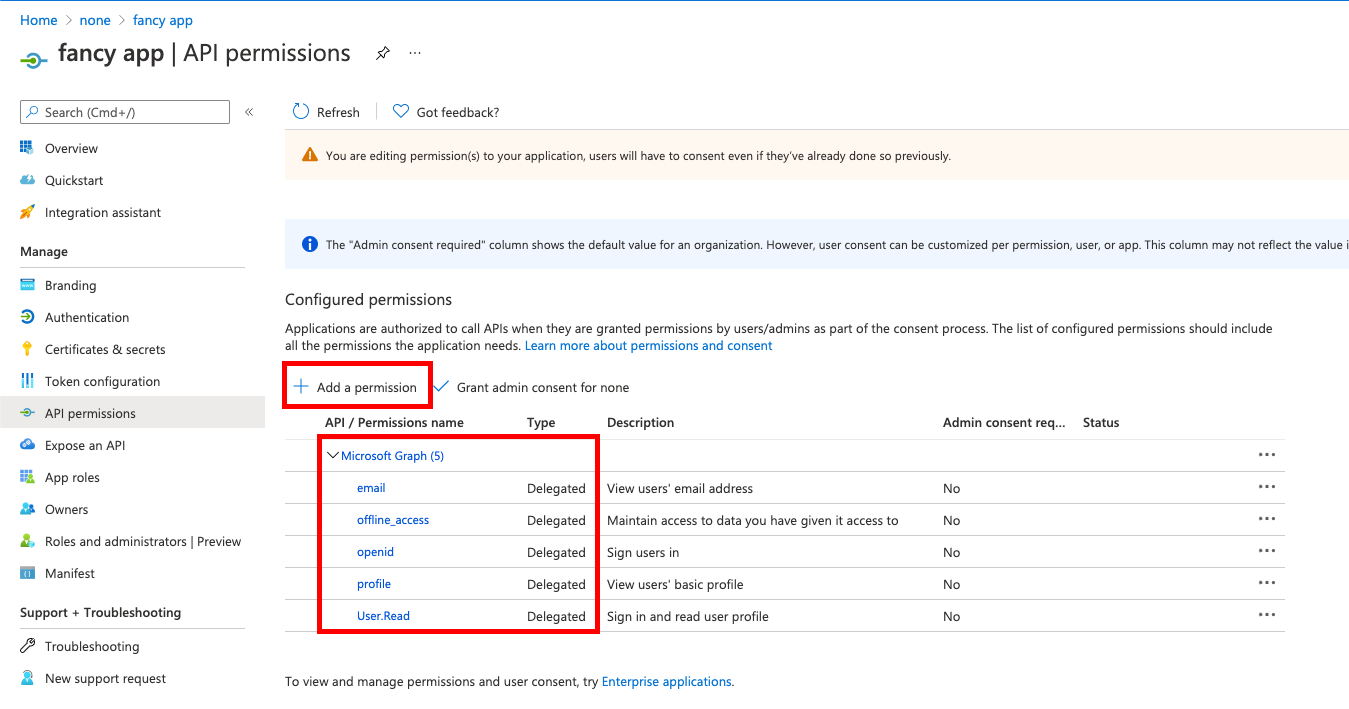
Go to and add delegated permissions.
-
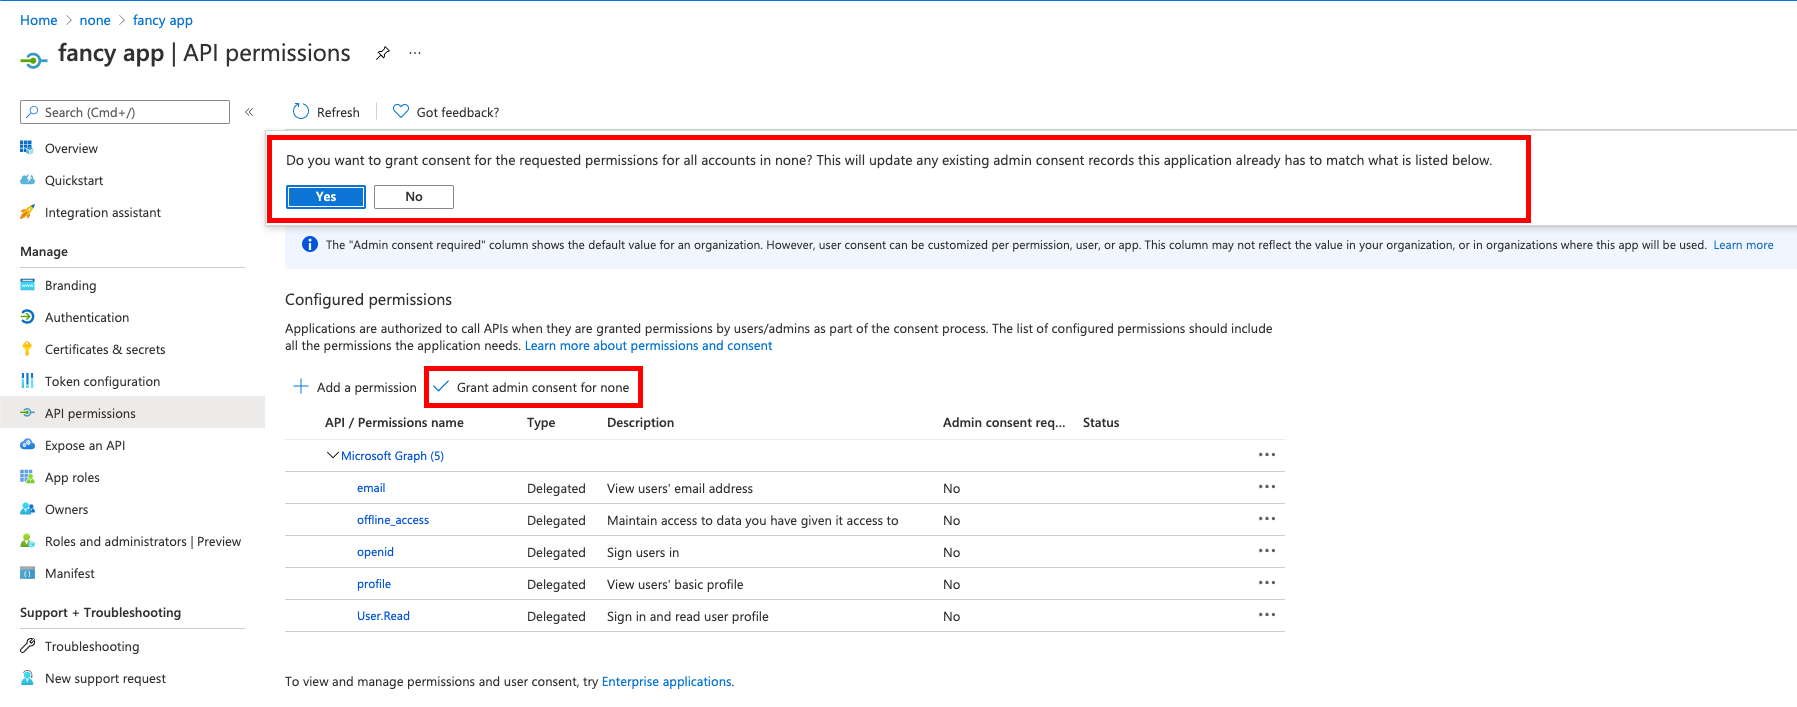
On the same page, do not forget to set Grant admin consent to all permissions.
-
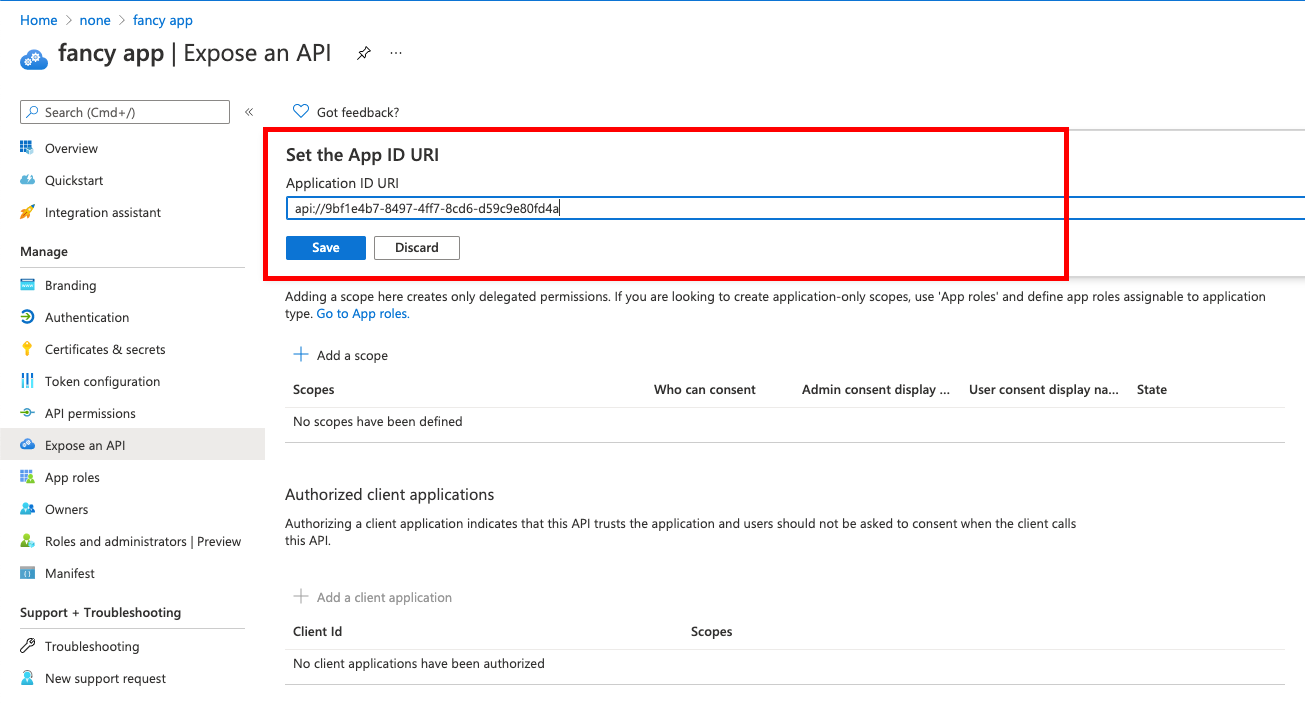
Go to and set the Application ID URI.
-
Then on the same page:
-
give the scope a meaningful name like owncloud and
-
allow Admins and users to consent. You will see the full api
scope namebelow your entered scope name.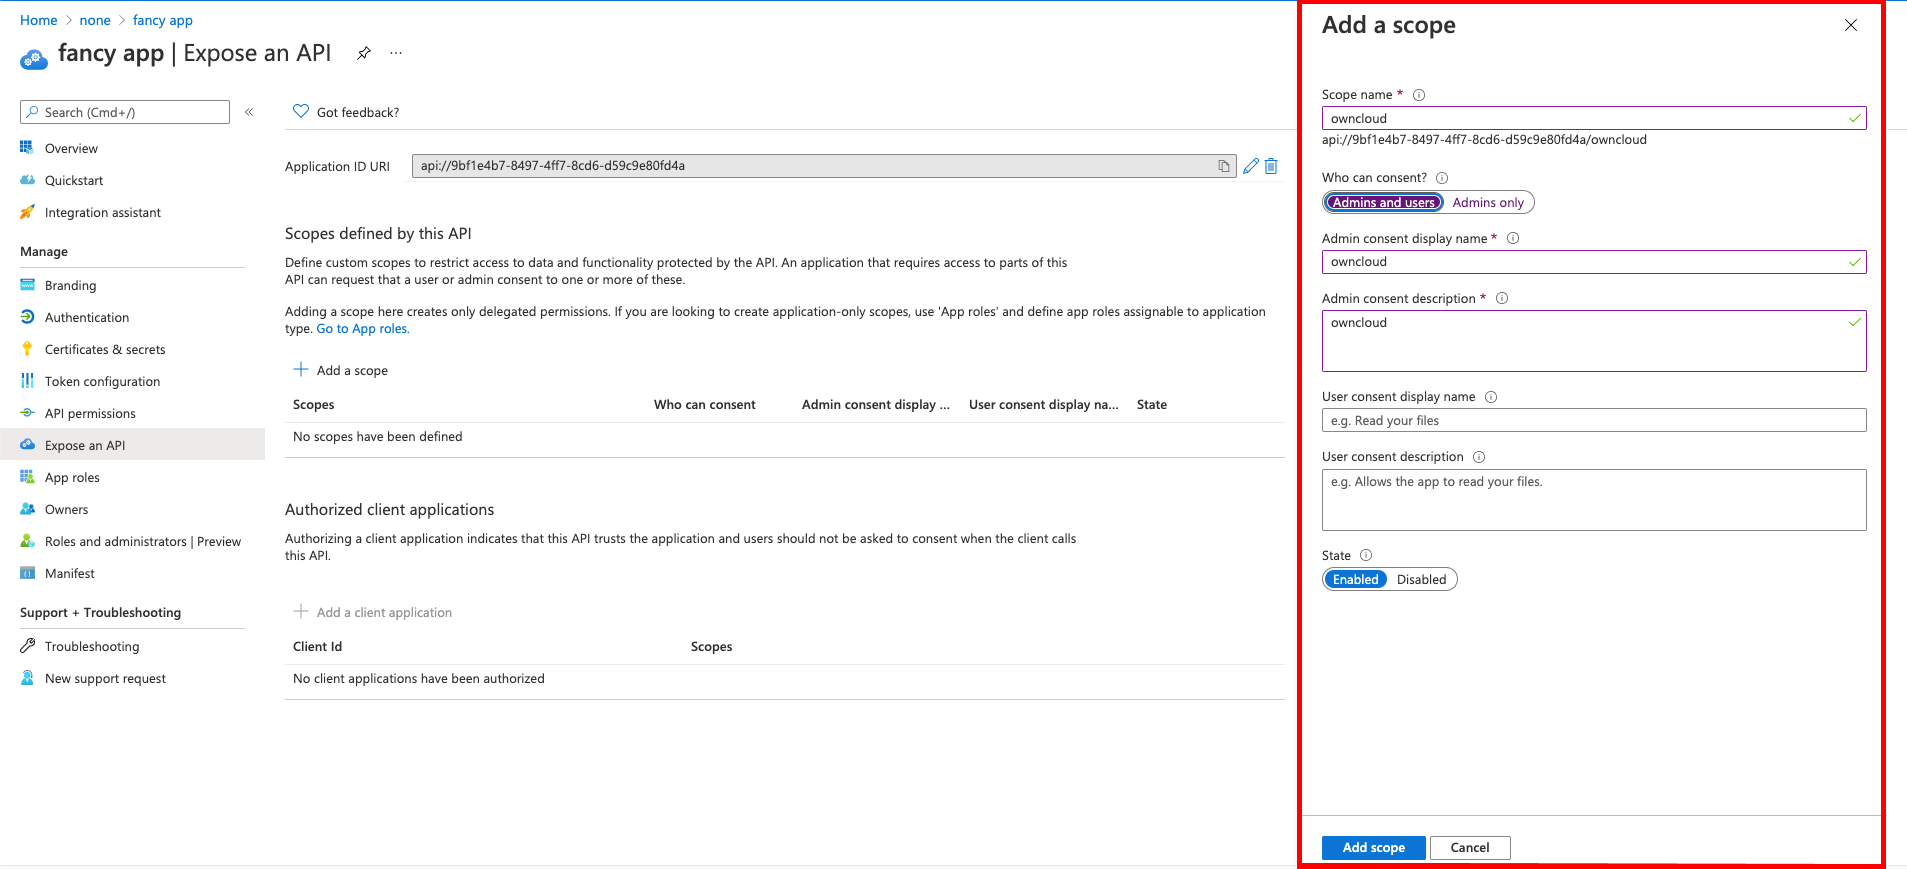
-
-
You get the
CLIENT-IDafter you have completed the Microsoft Azure setup process. On the following screen, you find an overview of most settings made. You can get there by clicking on Overview.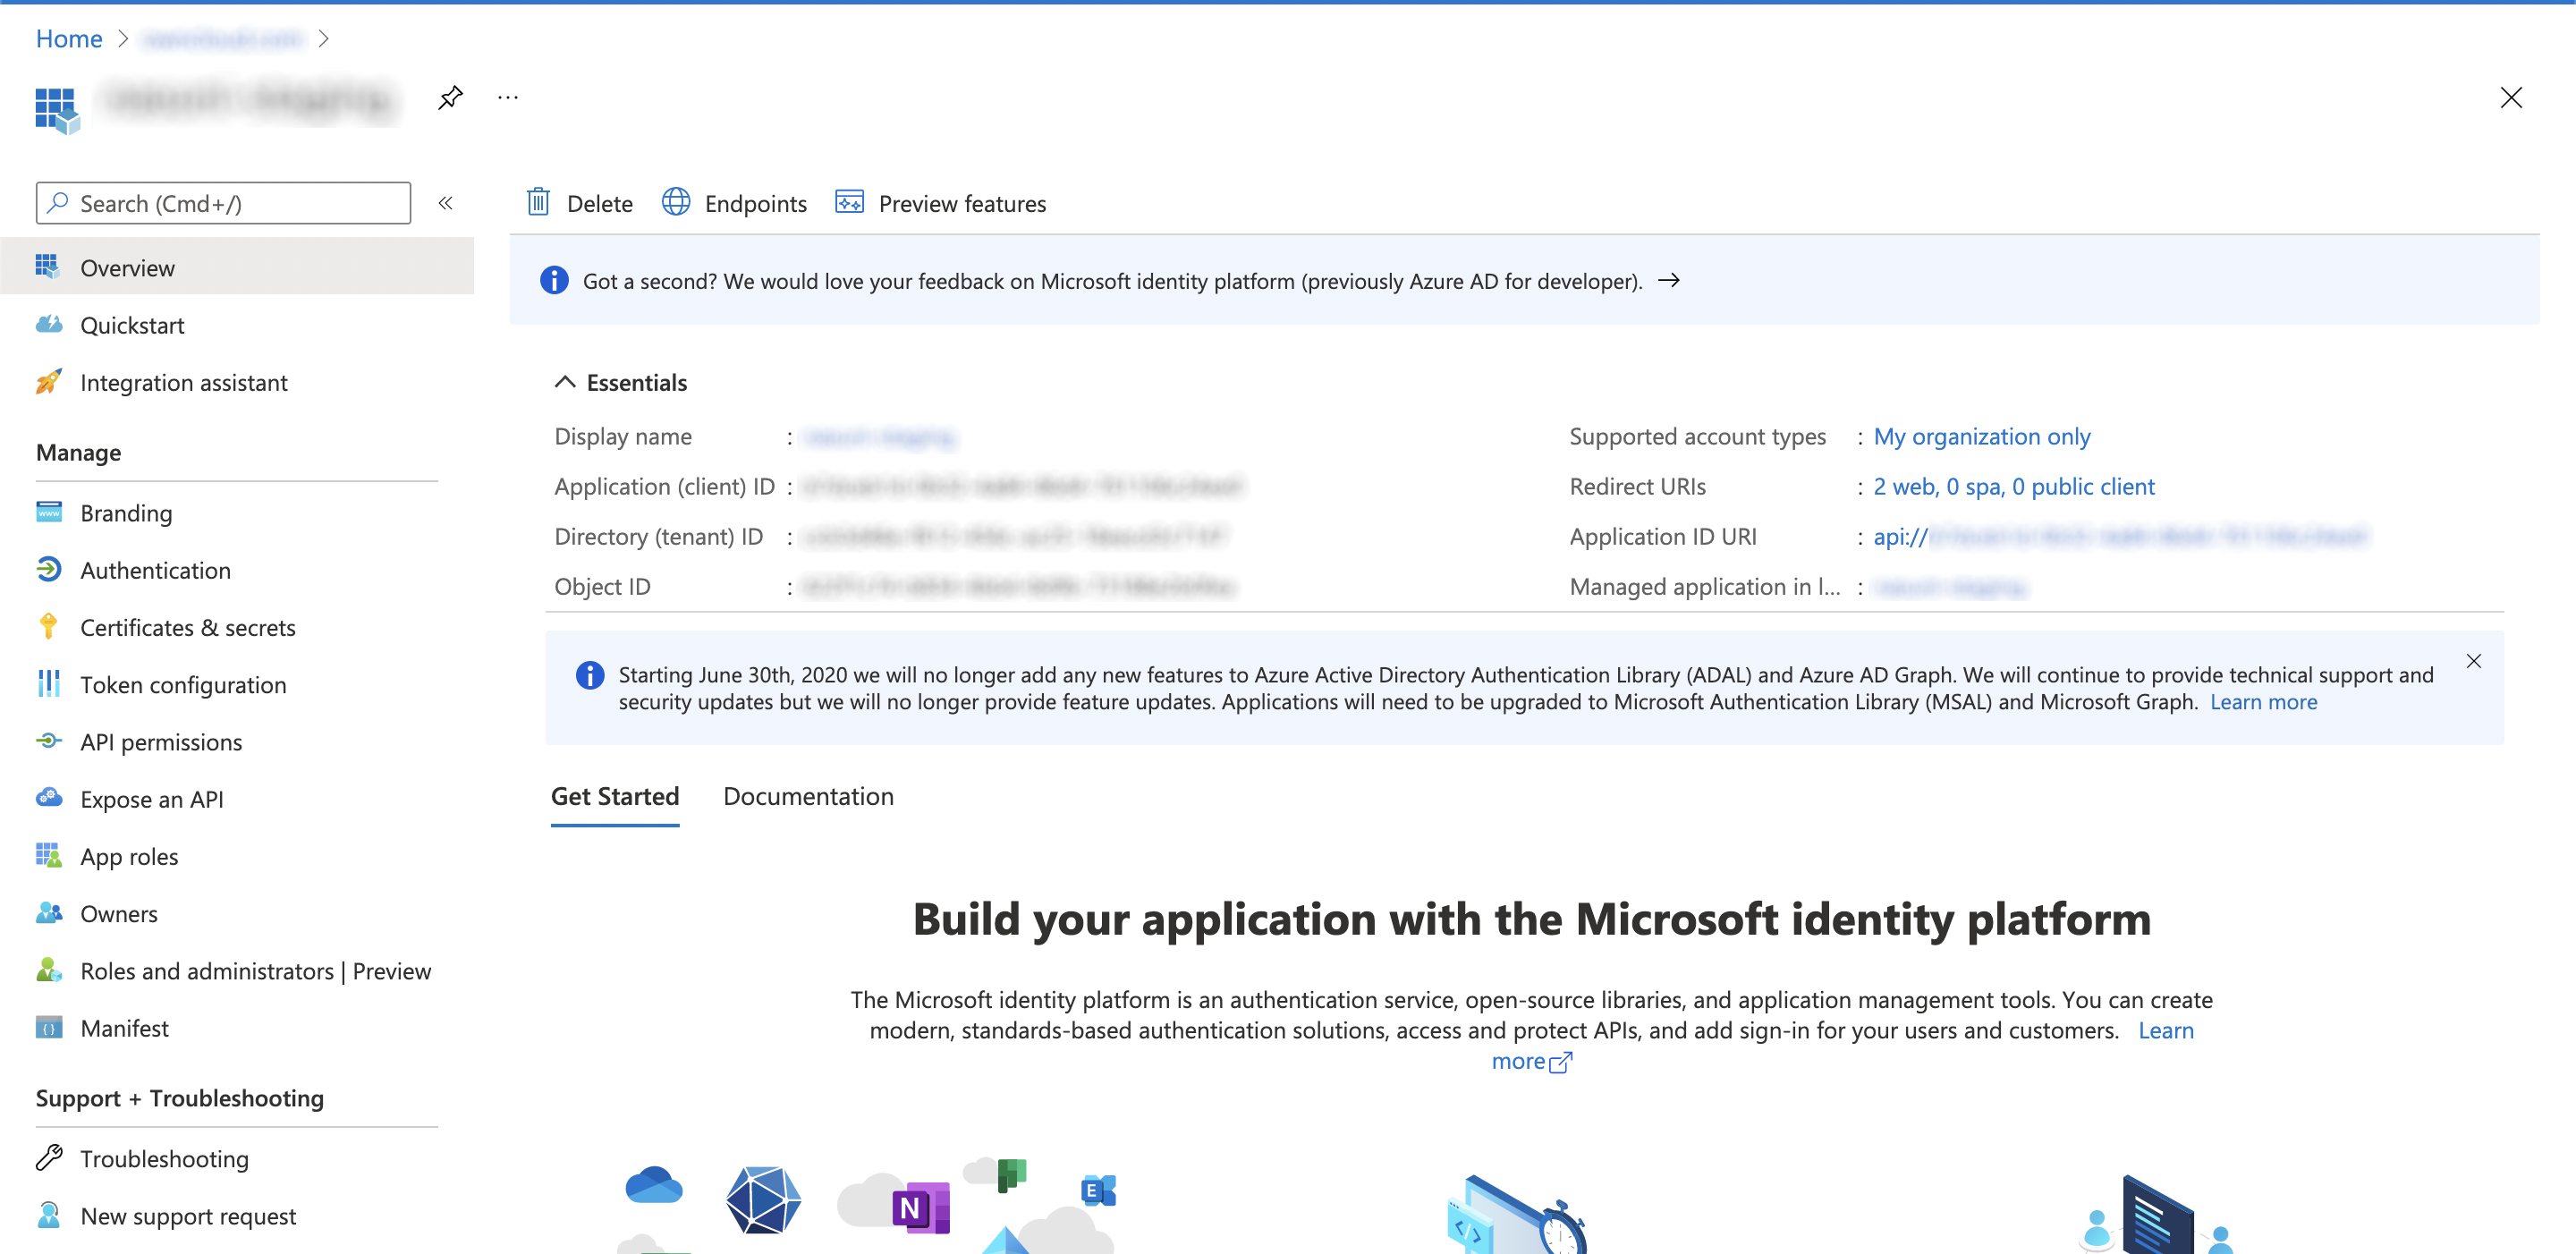
Microsoft Azure AD and RedirectURI
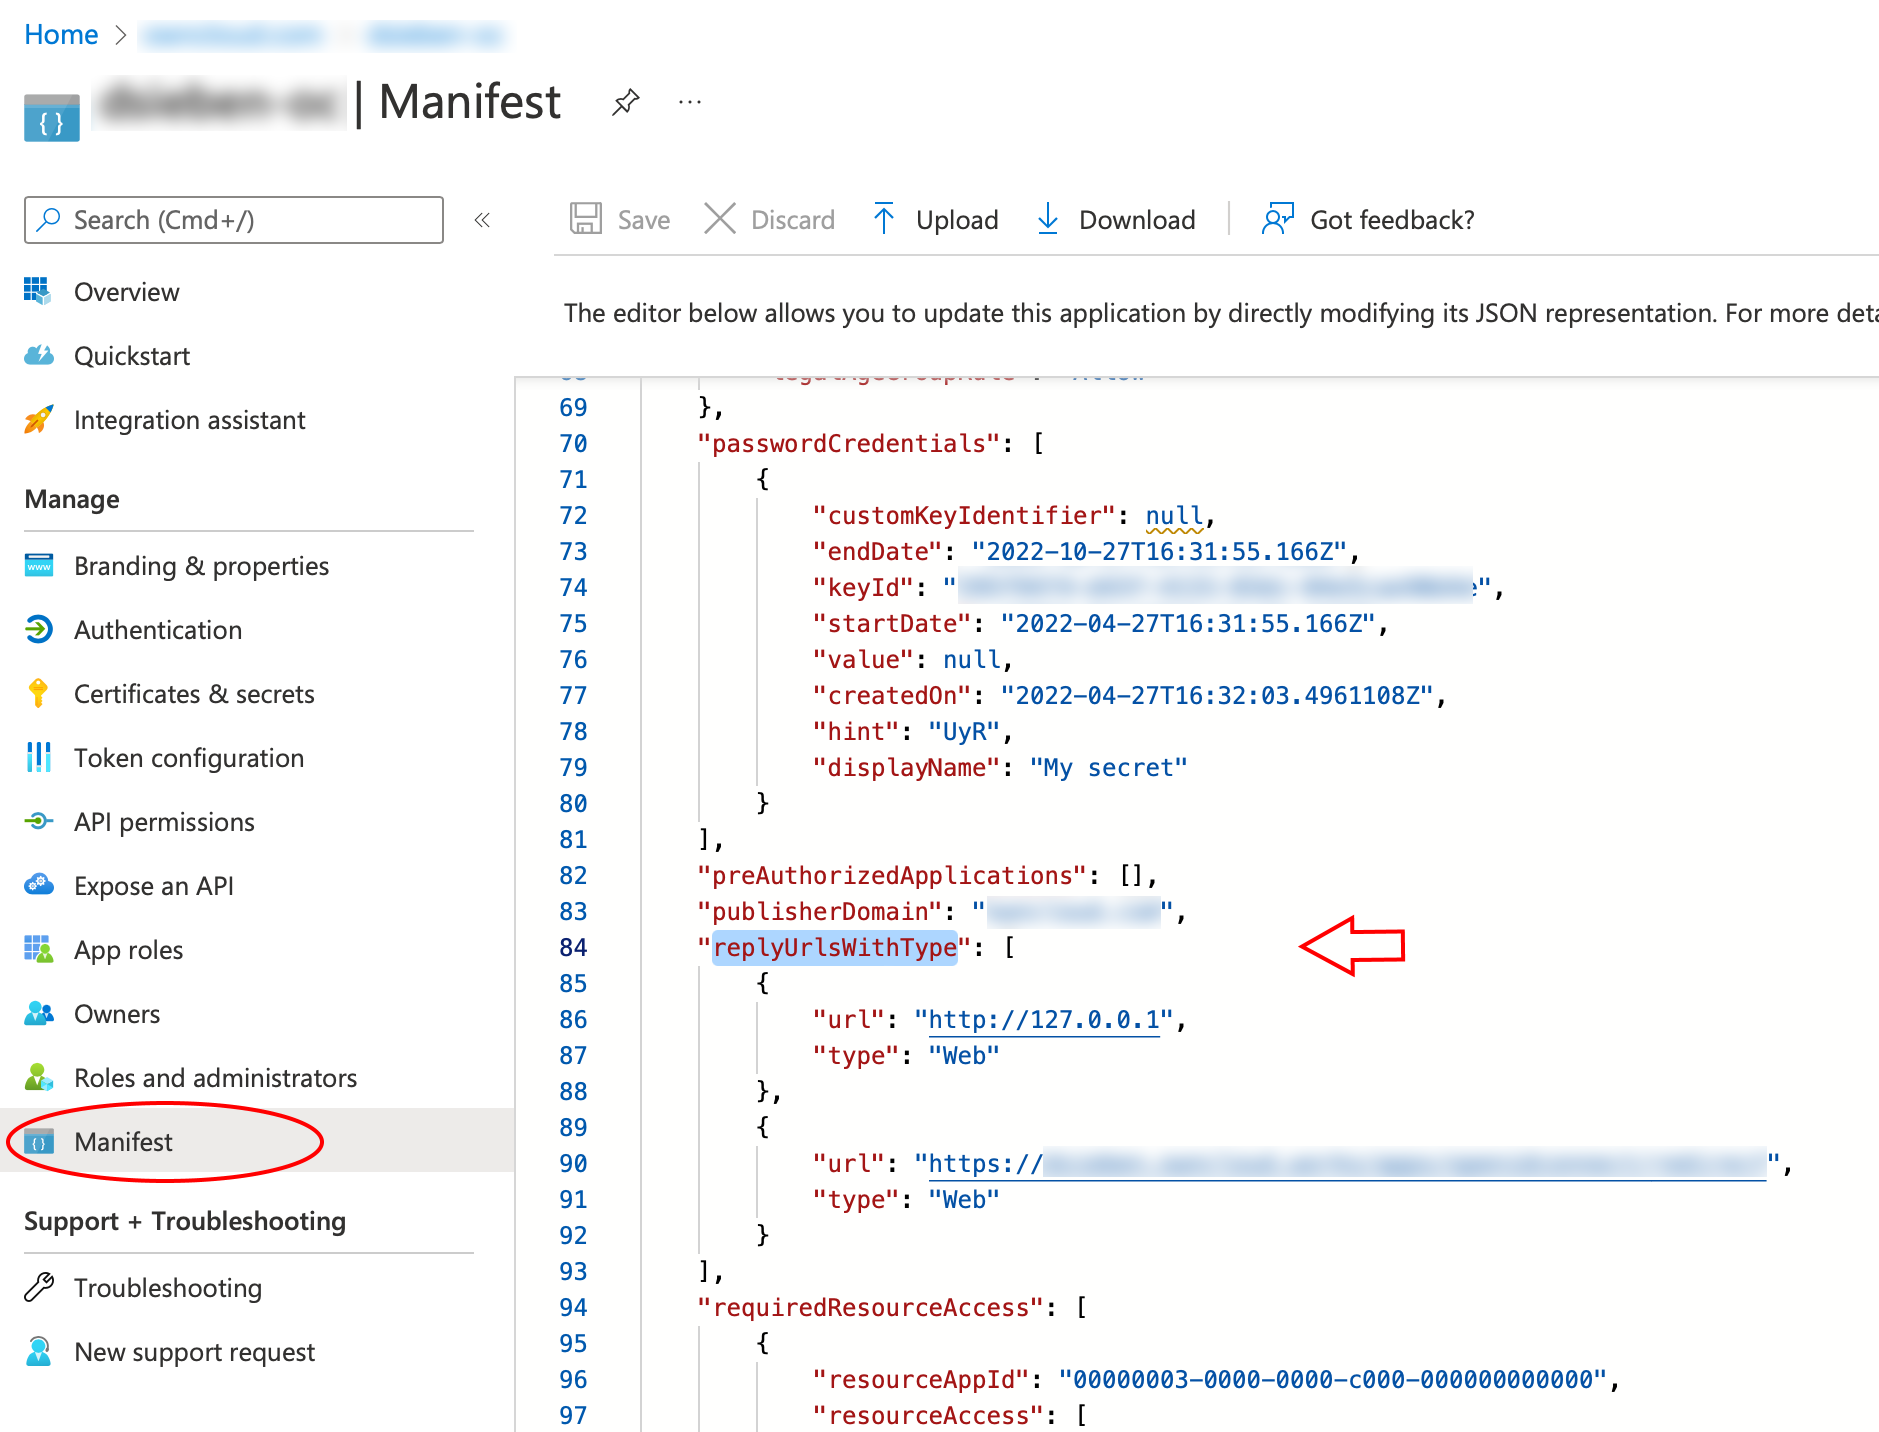
When it comes to use 127.0.0.1 instead of localhost as Redirect URI, the task is not straight forward. Microsoft has an own documentation for this describing a workaround, see Prefer 127.0.0.1 over localhost. In summary, you have to select in your app , then search for replyUrlsWithType and either add a new entry with 127.0.0.1 or modify an existing one.
Configure ownCloud Classic
To set up ownCloud Classic to work with OpenID Connect, you have to:
-
Install the OpenID Connect App.
-
Configure
config.php. -
Set up service discovery.
| It is recommended to first figure out all configurations on a test system and to bring it to the production system once it’s proven to work. Enabling the OpenID Connect App on the production system should be the last step in this process as it will then advertise OpenID Connect to all clients. |
List of OpenID Connect config.php Parameters
Follow this link to read more about the OIDC config.php parameters available to configure OpenID Connect on ownCloud Classic.
Example Setup
The example snippet below can be added to the environment variables. Both environment variables listed below need to be added. The example assumes that login users have already been created in ownCloud.
Use these links to see the corresponding configuration section for:
The following environment variables are used as templates. They must be adapted according to the classic key scheme shown one step below.
OWNCLOUD_HTTP_COOKIE_SAMESITE=None
OWNCLOUD_OPENID_CONNECT={"provider-url":"https://idp.example.net","client-id":"...","client-secret":"...","loginButtonName":"OpenID Connect"}
'http.cookie.samesite' => 'None',
'openid-connect' => [
'auto-provision' => ['enabled' => false],
'provider-url' => 'https://login.microsoftonline.com/YOUR-DIRECTORY-TENANT-ID/v2.0/',
'client-id' => 'YOUR-CLIENT-ID',
'client-secret' => 'YOUR-CLIENT-SECRET',
'loginButtonName' => 'Azure AD',
'autoRedirectOnLoginPage' => false,
'scopes' => [
'openid',
'api://YOUR-APPLICATION-ID-SCOPE-URI/owncloud',
'profile', 'email', 'offline_access',
],
'mode' => 'email',
'search-attribute' => 'unique_name',
'use-access-token-payload-for-user-info' => true,
],|
Which token version your app registration issues decides what ends up in the access token’s
Which of the two works depends on the openidconnect version, and for v1.0 tokens that difference decides whether the setup functions at all:
Take the value from verbatim: setting |
If you want to let ownCloud create users which are not present during a OIDC authentication, replace
'auto-provision' ⇒ ['enabled' ⇒ false], with:
    'auto-provision' => [
        'enabled' => true,
        'email-claim' => 'email',
        'display-name-claim' => 'name',
    ],
Use oAuth2 authentication for ownCloud Desktop and Mobile Clients
To allow the ownCloud clients (ownCloud Web, Desktop, Android and iOS) to interact with the ownCloud Classic server, you have to install and enable the oAuth2 app. Please see the Open Authentication (OAuth2) for more details. In this setup, your ownCloud Clients will work without extra hassles, but please be advised that the ownCloud Classic server is acting as identity provider for the clients and you will not be able to delete those clients directly from your identity management solution.
Register ownCloud Desktop and Mobile Clients with Azure AD
To allow the ownCloud clients (ownCloud Web, Desktop, Android and iOS) to interact directly with the identity provider, you have to register them as clients.
Only branded ownCloud desktop and mobile clients can be registered with Azure AD, because they need to be built with customized scope and prompt parameters. As prerequisite, an ownCloud full branding subscription is needed. For more details get in touch with ownCloud Support.