Install Antivirus Software in the ownCloud Appliance
Install ClamAV and Related Components
First, start the appliance and go to "System and domain settings".
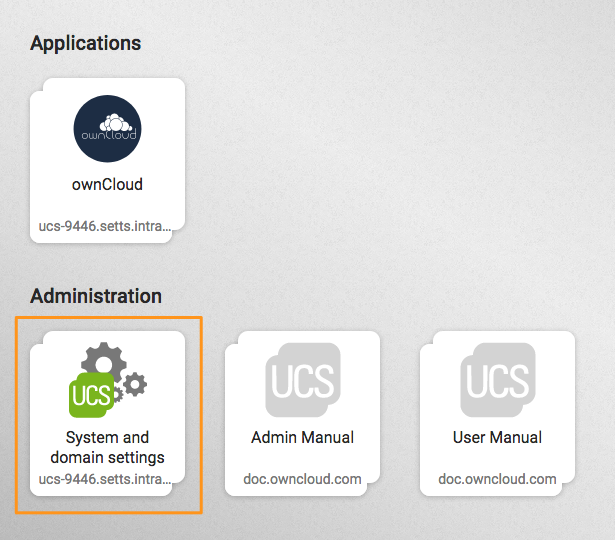
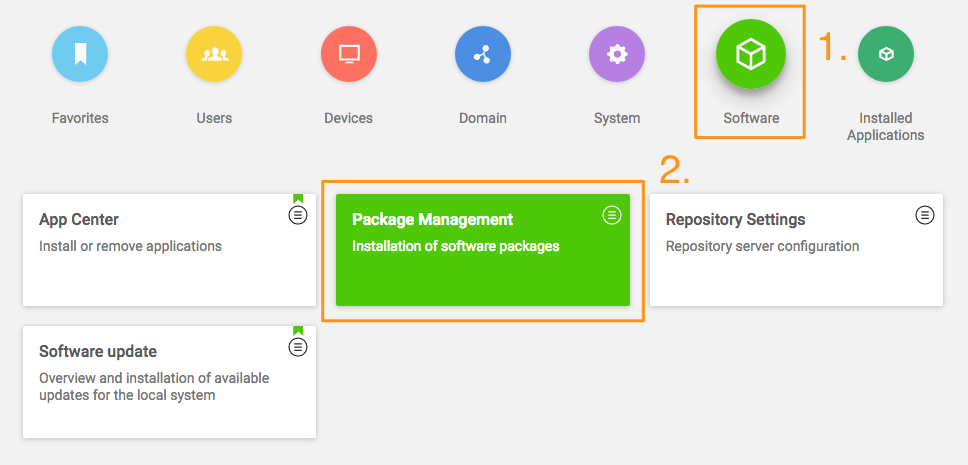
When there, log in with the administrator account. After you have done that, click Software and open "Package Management", as in the screenshot below.
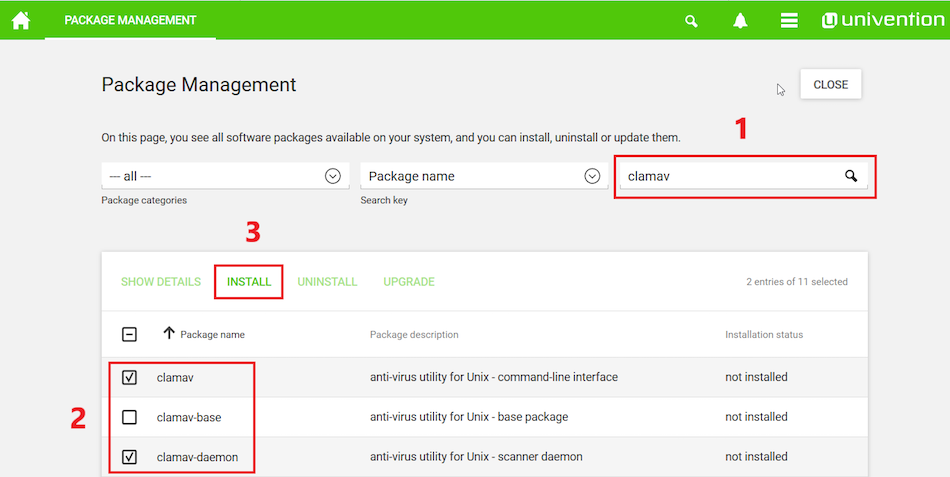
From there, you first need to install ClamAV. To do this, in the third field, next to the one containing the text "Package name", type in the phrase: "clamav" (1). Doing so filters the list of packages to only those matching that phrase. In the filtered list of packages, check the checkboxes next to "clamav" (2), "clamav-freshclam", and "clamav-daemon".
After doing that, click INSTALL (3) above the listed packages, next to "SHOW DETAILS'".
After you do so, a confirmation dialog appears, as in the screenshot below, asking for confirmation to install the packages. Confirm the choice by again clicking INSTALL.
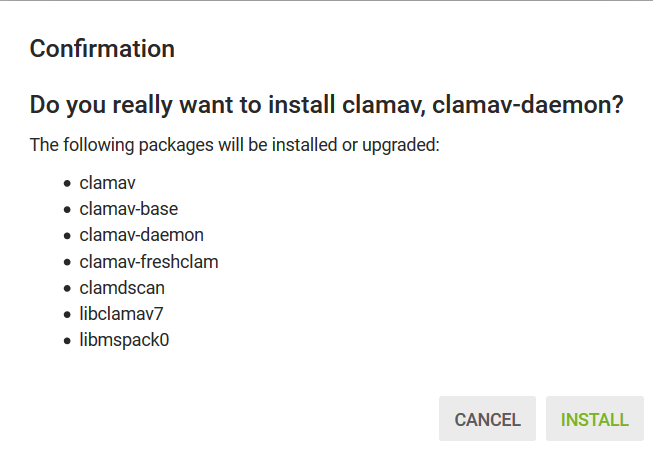
The installation should only take a few minutes.
Configure ownCloud to Use ClamAV
Start the ClamAV service:
systemctl enable clamav-daemon.service
systemctl start clamav-daemon.service
Next you need to configure ClamAV in your ownCloud instance. Please refer to the ClamAV documentation for instructions on how to do that.
Troubleshooting
If you try to update the ClamAV virus database manually, by entering freshclam, and see the error below it means, that
freshclam is already updating the database.
ERROR: /var/log/clamav/freshclam.log is locked by another process
ERROR: Problem with internal logger (UpdateLogFile = /var/log/clamav/freshclam.log).
Updates are run based on the configured time interval in the applicable Cron job. In the example below, the update would run every 47 minutes:
# m   h  dom mon dow  command
47  *  *   *    *  /usr/bin/freshclam --quiet
If there are errors running the freshclam process, check if a process is blocking the log file, by running the following command:
lsof /var/log/clamav/freshclam.logIf you want to refresh the ClamAV database manually, follow these steps and gently end the freshclam process with this command:
sudo pkill -15 -x freshclamStart the refresh process again with this command:
sudo freshclam|
When the app is enabled — but is not configured or has an incorrect configuration — it will reject all uploads for the entire instance. To avoid this situation, make sure the ClamAV service is running and you have the execution mode correctly configured in ownCloud. |